Use Excel to Mass Manage your Custom Object Fields in Salesforce
Announcing another great addition to our Windows version of XL-Connector (COM add-in): a new tool to mass create/update/delete fields in Salesforce directly from your Excel spreadsheet.
If you are a Salesforce admin struggling with a lot of custom objects and fields, you’ll save hours of your time if you give XL-Connector a shot.
Now you can quickly download all fields from a certain object edit them, and upload them back.
-
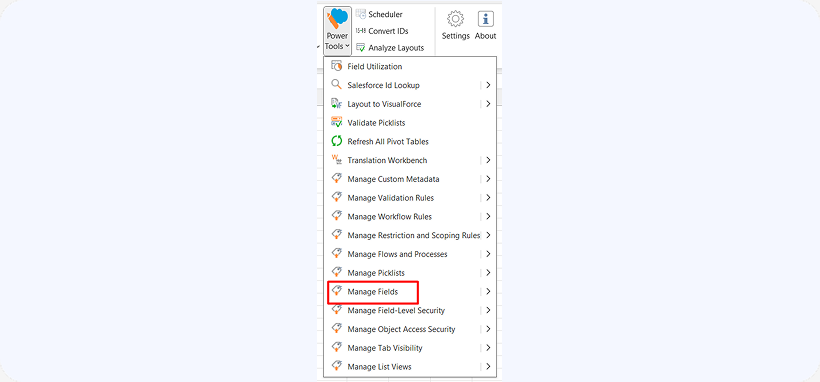
To start, click on the Power Tools -> Manage Fields ribbon item in XL-Connector:
-
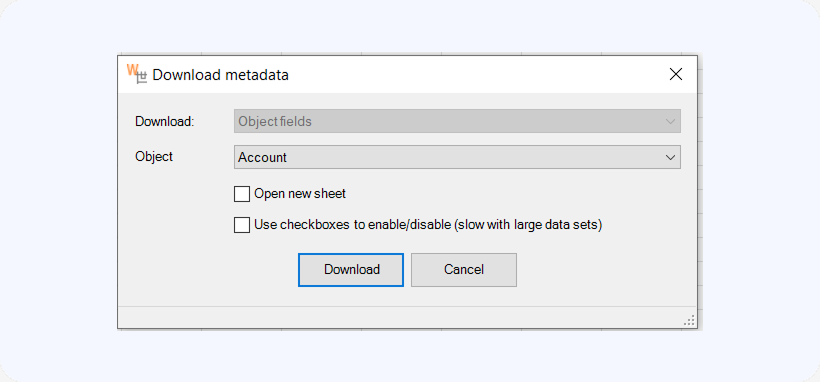
A dialog box will be displayed to download fields for any of the objects in your org:

-
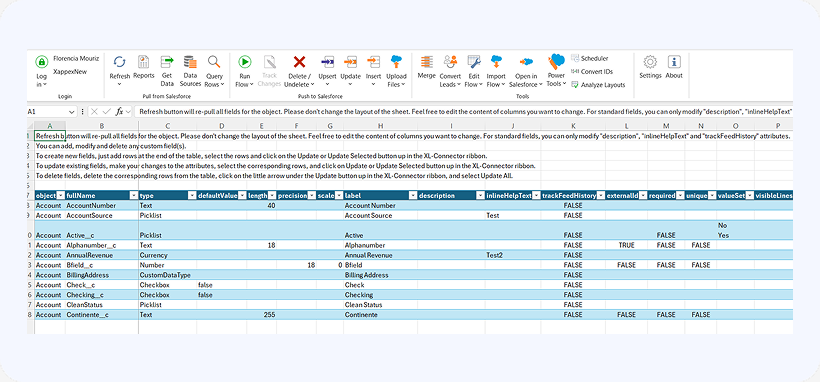
Once downloaded, all fields will appear in your Excel spreadsheet making it possible to edit any of their attributes:
-
Click on the Refresh button up in the XL-Connector ribbon to re-pull all fields from Salesforce.
How to mass create fields in Salesforce
To mass create new fields, add rows at the end of the table, select the new rows, and click on the Update or Update Selected button up in the XL-Connector ribbon. You can also use Update All button that you’ll find under the Update button in the XL-Connector ribbon.
How to mass update fields in Salesforce
To mass update existing fields, make your changes to the attributes, select the corresponding rows, and click on Update or Update Selected button up in the XL-Connector ribbon. You can also use Update All button that you’ll find under the Update button in the XL-Connector ribbon.
How to mass delete fields in Salesforce
To delete fields, delete the corresponding rows from the table, click on the little arrow under the Update button up in the XL-Connector ribbon, and select Update All.