With XL-Connector you can easily insert new records to Salesforce directly from an Excel spreadsheet in a few simple steps. No csv hassle or manual labour.
Easily create new records in Salesforce with XL-Connector
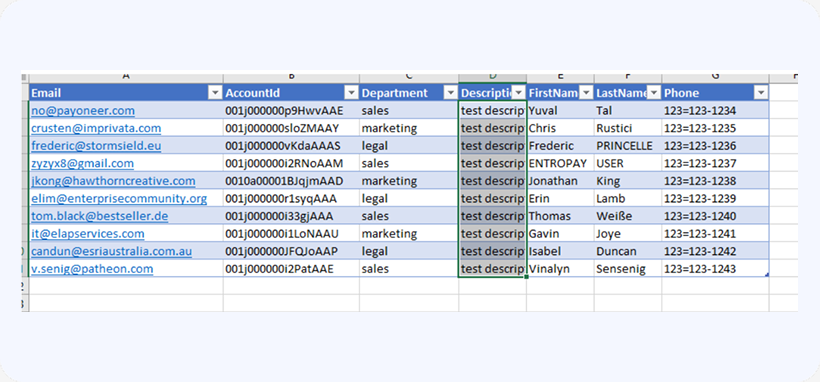
In this example we’ll load Contacts as this is probably the most common scenario in any CRM. Here’s the spreadsheet that we need to load:
To load the above contacts do the following:
-
1
Log in to Salesforce by clicking the Log in button (you can also use Web Login).
-
2
Select values in Excel so that your selection spans across all rows, e.g.:

-
3
Click Insert in the XL-Connector ribbon.
-
4
Click OK in the information dialog box.
-
5
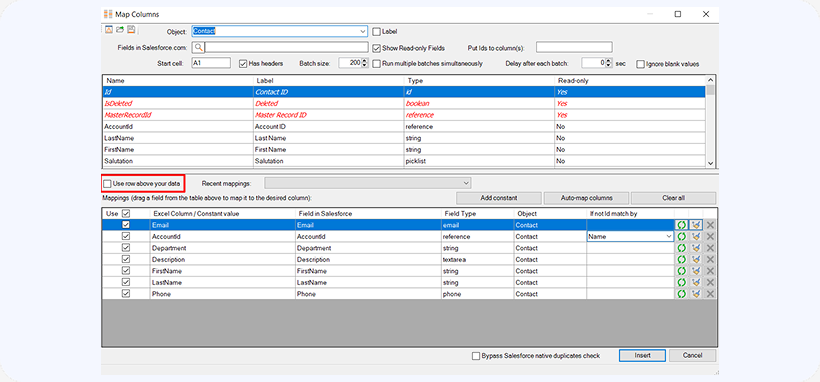
In the mapping dialog, select the object you’re loading records into in the next dialog box, in this case the object is Contact.
-
6
Then map your Excel columns to fields in Salesforce by dragging fields from the top table and dropping them on the columns in the bottom table. In our example the mappings will look as follows:
-
7
The resulting Ids of any DML operation (Insert/Update/Upsert) can now be placed into multiple columns within your worksheet, just specify the column indices or letters in the Put Ids to column(s) box, comma-separated:
-
8
You can also store your field mappings right in the excel spreadsheet (two rows above your data)! This will help when you move your data around the spreadsheet and don’t want the mappings to get messed up. Just click on Use row above your data and populate your spreadsheet with the object and field API names as indicated in the screenshot. Having no field API name above a column is equivalent to unchecking the Use box in mappings – the column will not get uploaded.
-
9
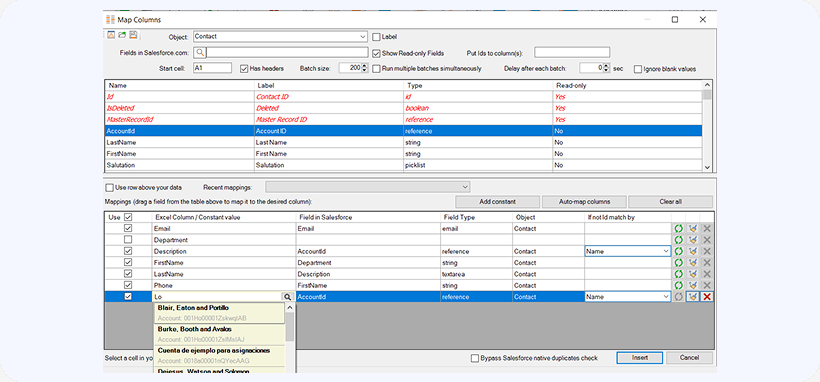
If you ever find yourself in a position when you need to upload the same value for all rows of data, there’s no need to have an additional column in the data containing this value. Constant mappings will come in handy when uploading records for the same owner, same record type, or same parent.
-
10
Now click Insert and your contacts will be loaded into Salesforce under the corresponding accounts. You’ll note that XL-Connector provides the ID numbers for the newly created records or error messages explaining why not, to the right of your original spreadsheet rows, one column over.


Watch our tutorial video: