Every connected app that integrates with Salesforce, including G-Connector, must be previously installed in the Salesforce org by an admin.
If you’re a Salesforce user and don’t have a permission to install an app in Salesforce, send this link to your Salesforce admin.
If you’re an admin, please follow these steps:
How to install G-Connector in Salesforce
-
1
Install G-Connector in your Google Sheets from this link.
-
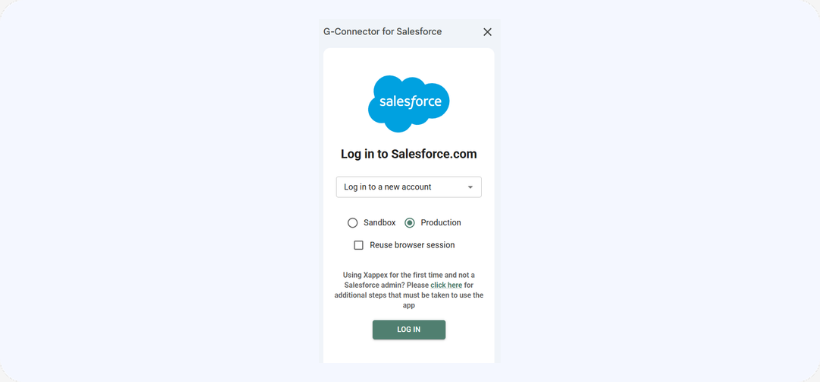
2
To log in to Salesforce, select the Production or Sandbox radio button, or click ‘Reuse browser session.’
-
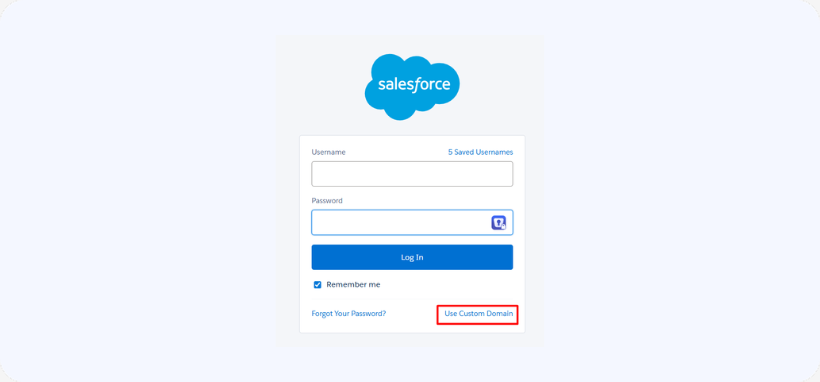
3
If you selected Production or Sandbox, click ‘Use Custom Domain’

-
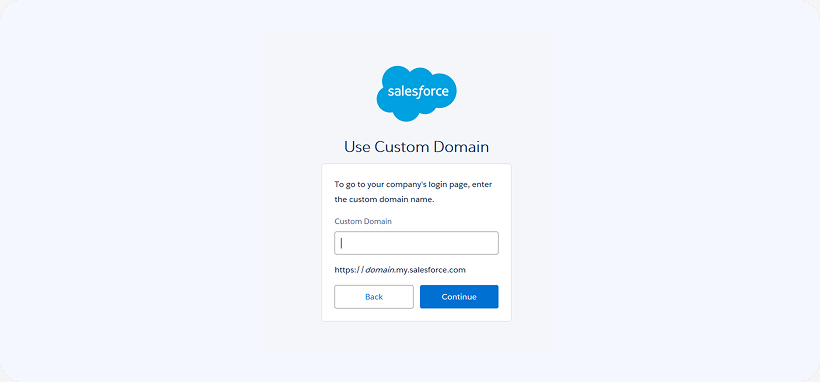
4
Enter your domain and click continue.
-
5
Log in with your credentials or through single sign on set up by your org.
-
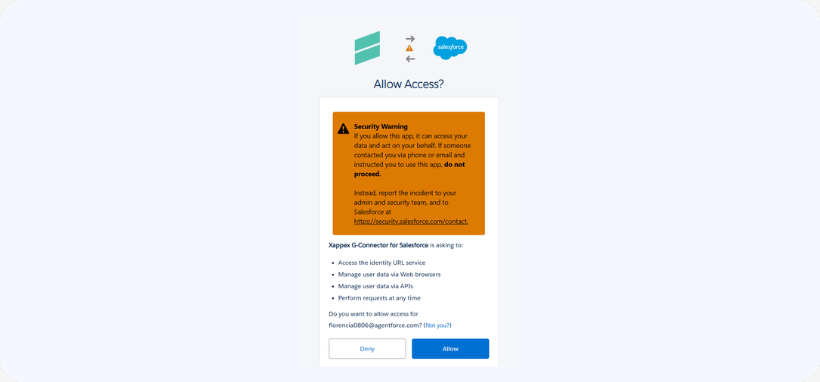
6
Click the Allow button that appears on the next screen.
-
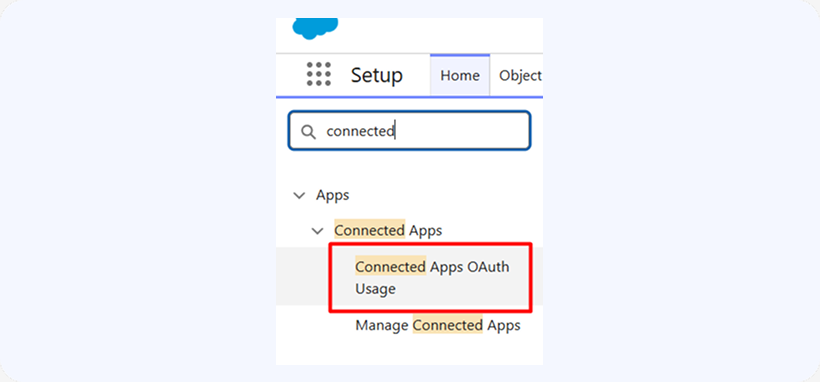
7
After this, go to your Salesforce org to Setup → Connected Apps OAuth Usage.
-
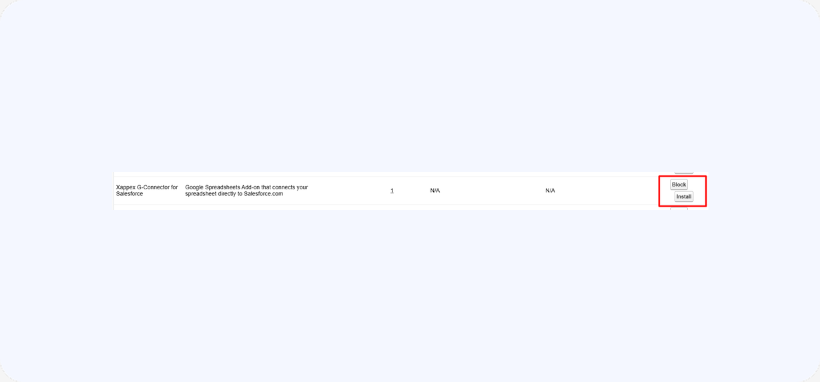
8
Locate G-Connector.
-
9
Click Install next to it.
-
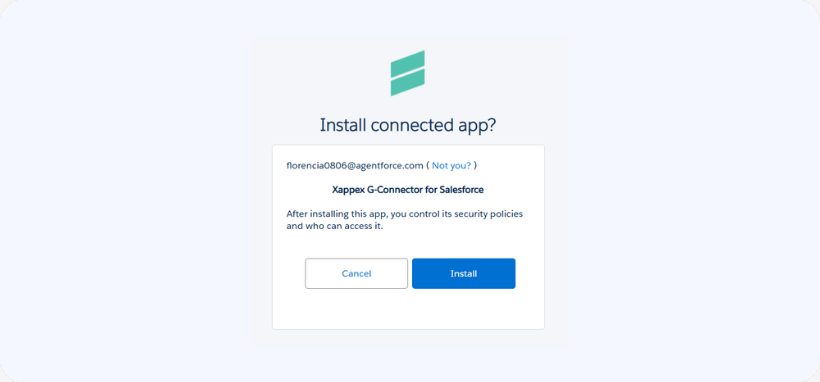
10
Confirm the installation.
🤝Feel free to share this information with colleagues who are new to Xappex apps or testing them for the first time — it will help them get set up smoothly.
We’re here to support you. If you need assistance assigning the new permission or installing Xappex apps in your org, please contact our support team at support@xappex.com or access our chat on the website.
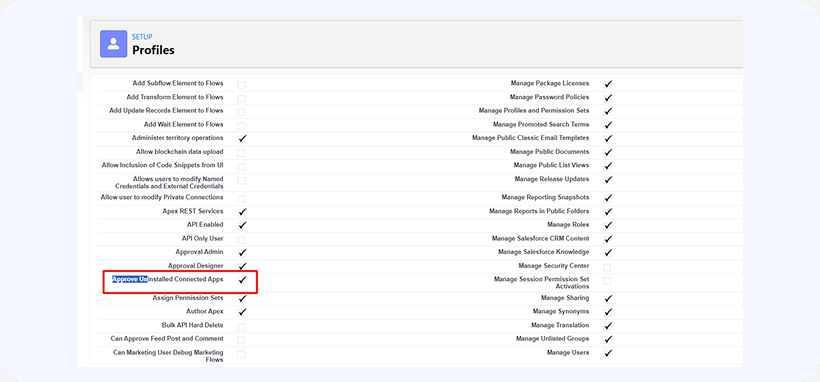
NOTE: If these steps do not work to make the app visible under Connected Apps even though you are an admin, please check that your profile has the following permission selected under System Permissions’:
How to limit access to G-Connector only to certain users and profiles
-
11. Open the Connected App in Setup
- In Salesforce Setup, search for App Manager.
- Find XL-Connector in the list.
- Click the ▼ arrow on the right and choose View (or Edit if already set up).
-
2
Enable Profile-Based Access Control
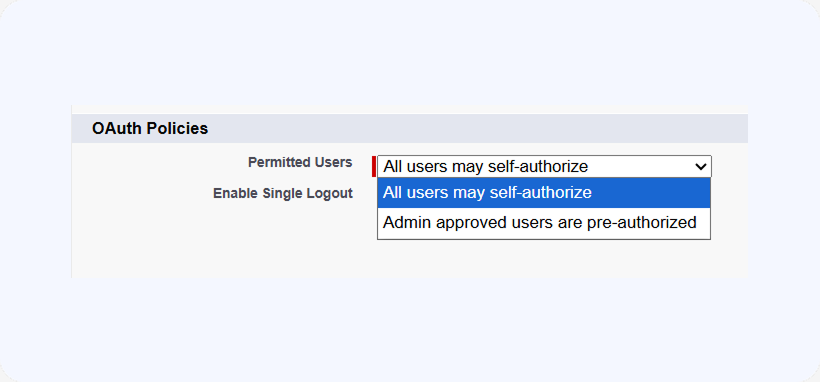
- On the connected app page, click Manage.
- Under OAuth policies or Profiles, look for Permitted Users.
- Change Permitted Users from:
- All users may self-authorize
 Admin approved users are pre-authorized.
- All users may self-authorize
- Save the change.
-
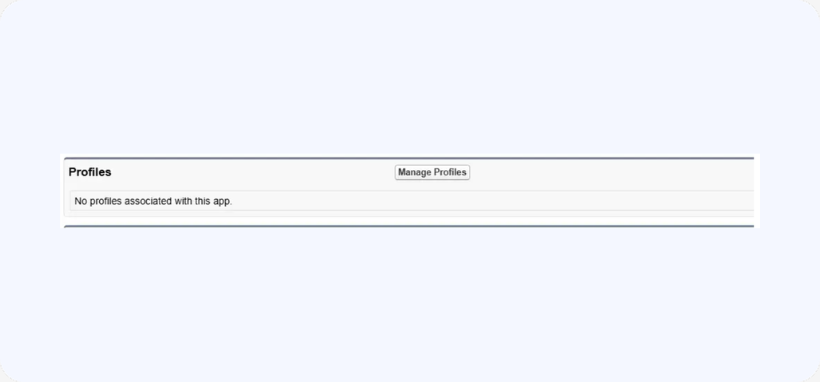
3Assign the connector to Specific Profiles
- After saving, you’ll see a Profiles or Manage Profiles button (or a related list).
- Select only the profiles you want to have access to the app.
- Save.
-
4Assign the connector to Specific Permission Sets (Optional)
If you prefer more granular control:- Create a Permission Set with the needed Connected App Access.
- Assign this permission set to the desired users.
- Keep Permitted Users set to Admin approved users are pre-authorized.
-
5Verify Access
- Log in as an allowed user to confirm they can authorize the app.
- Log in as a non-allowed user to ensure access is blocked.
Tip
Using permission sets is generally better than profile-only restriction because it’s more flexible and doesn’t require changing users’ main profiles.