What Changing a Record Type Really Means
A record type in Salesforce controls:
- Page layouts: You can create specific and custom layouts for each Record Type without altering the record itself.
- Available picklist values: You can select which picklist values you want to have available for each Record Type.
- Business processes: You can customize and streamline your business processes by creating Record Types that reflect your needs in different situations.
Changing a record type does not actually create a new record, and it does not delete or modify any existing data.
It’s important to remember that a Record Type is not the same as a “Type” picklist field.
If you want to change a picklist value labeled “Type,” simply edit the record; that does not require changing the record type.
Method 1: Change Record Type in Lightning (Single Record)
-
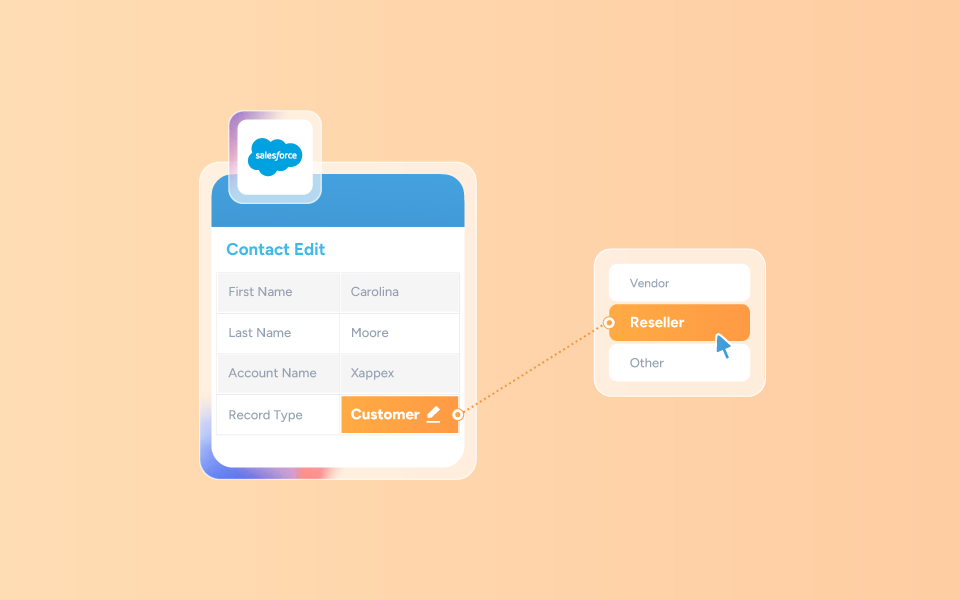
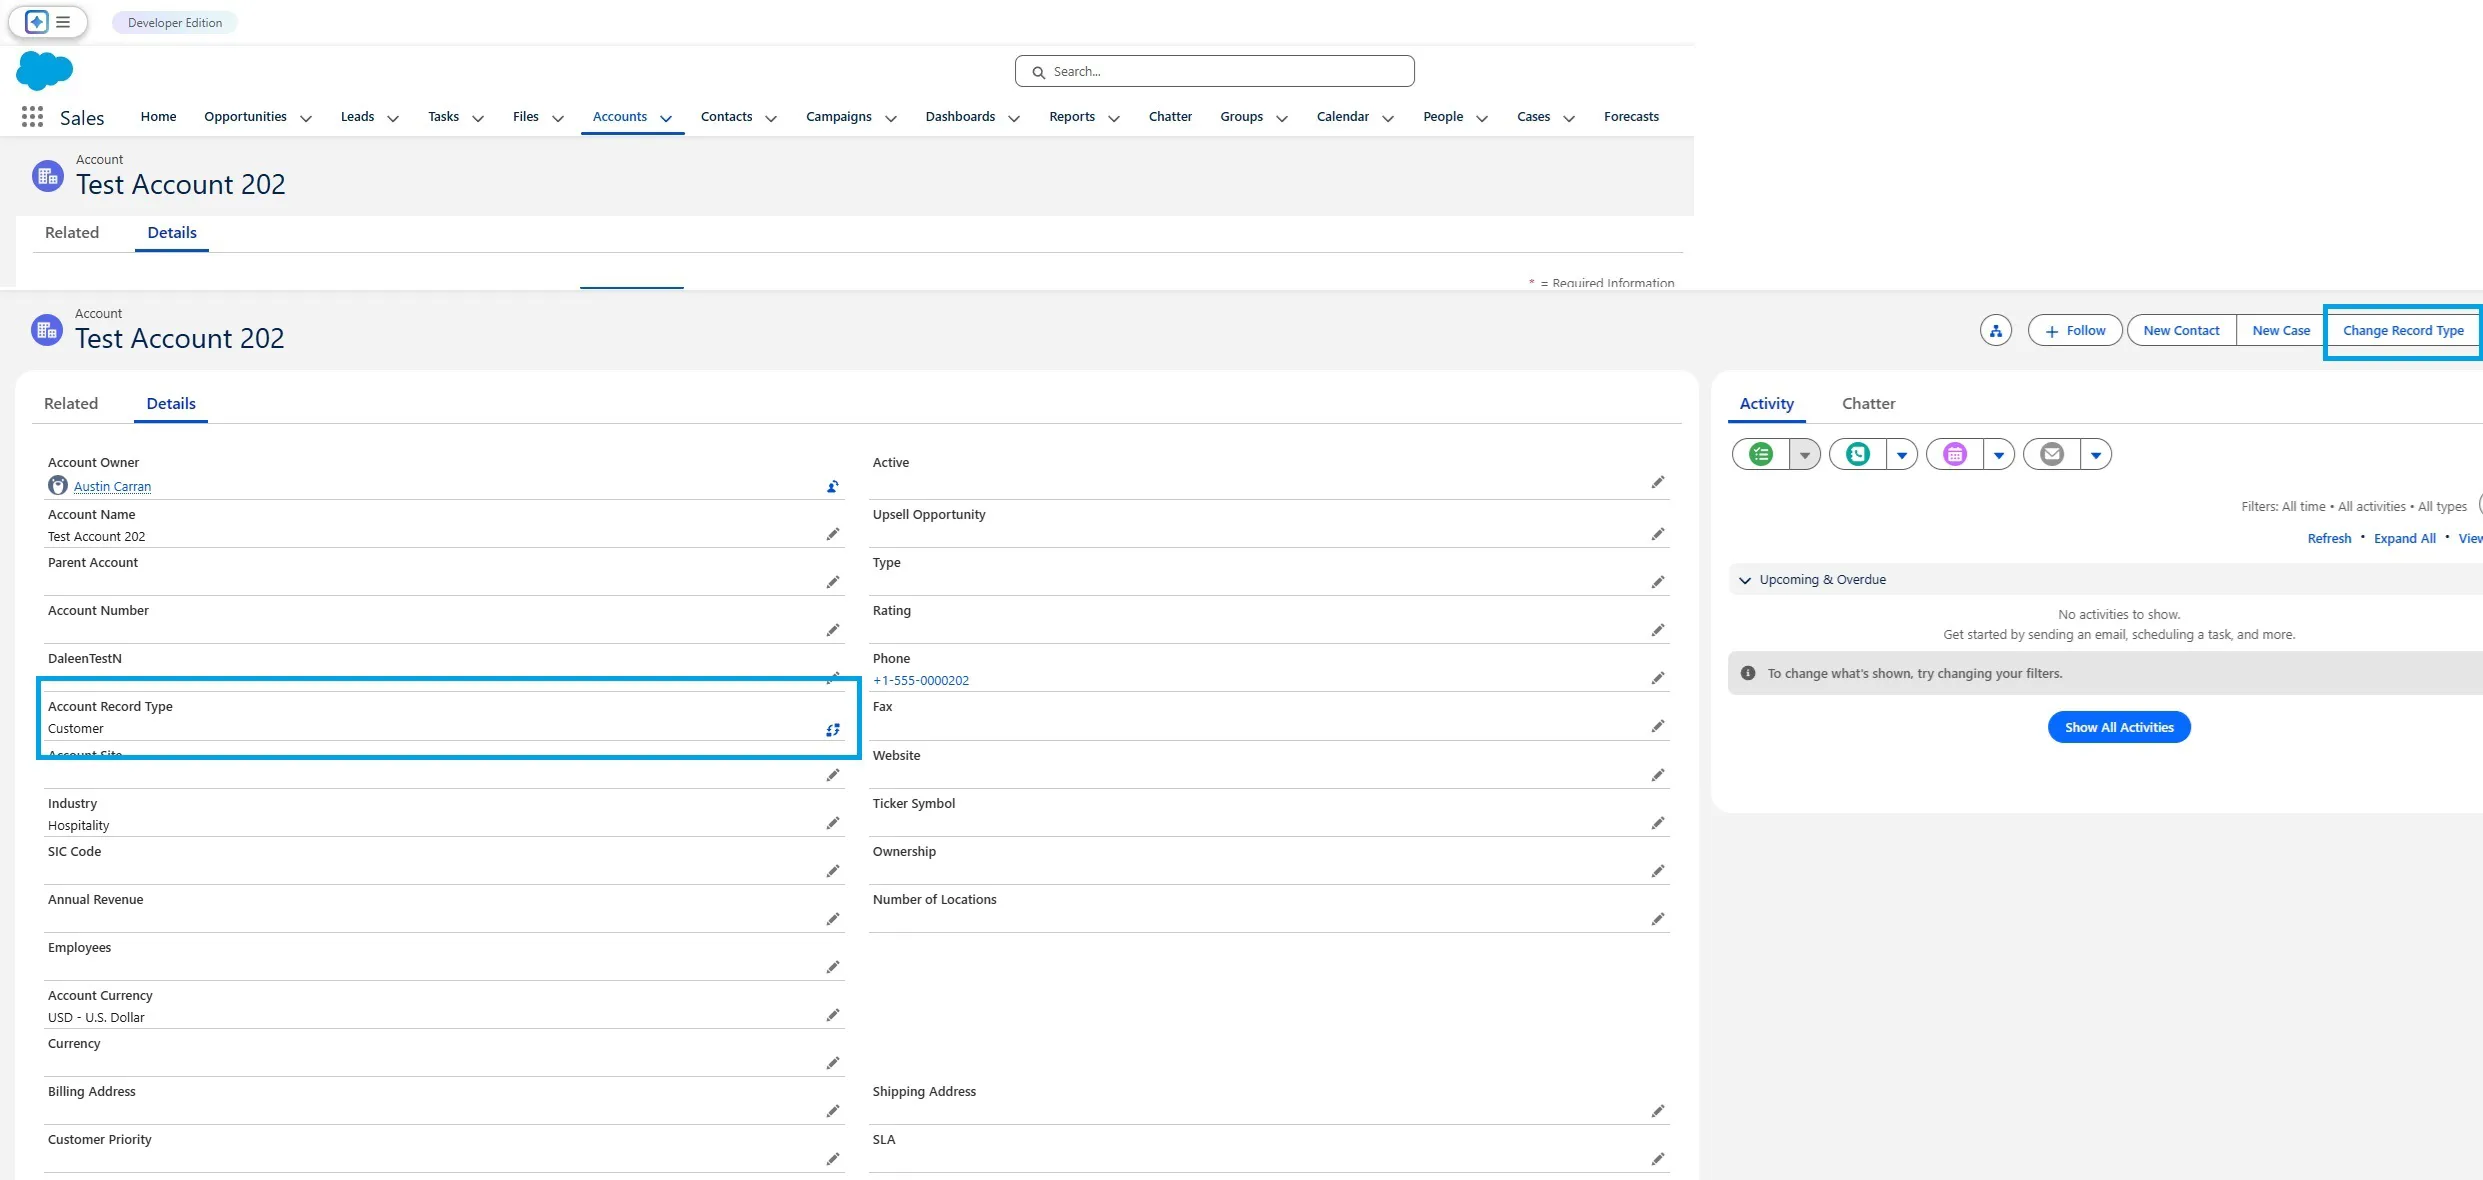
Click the “Change Record Type” link next to the Record Type field on the record page;
-
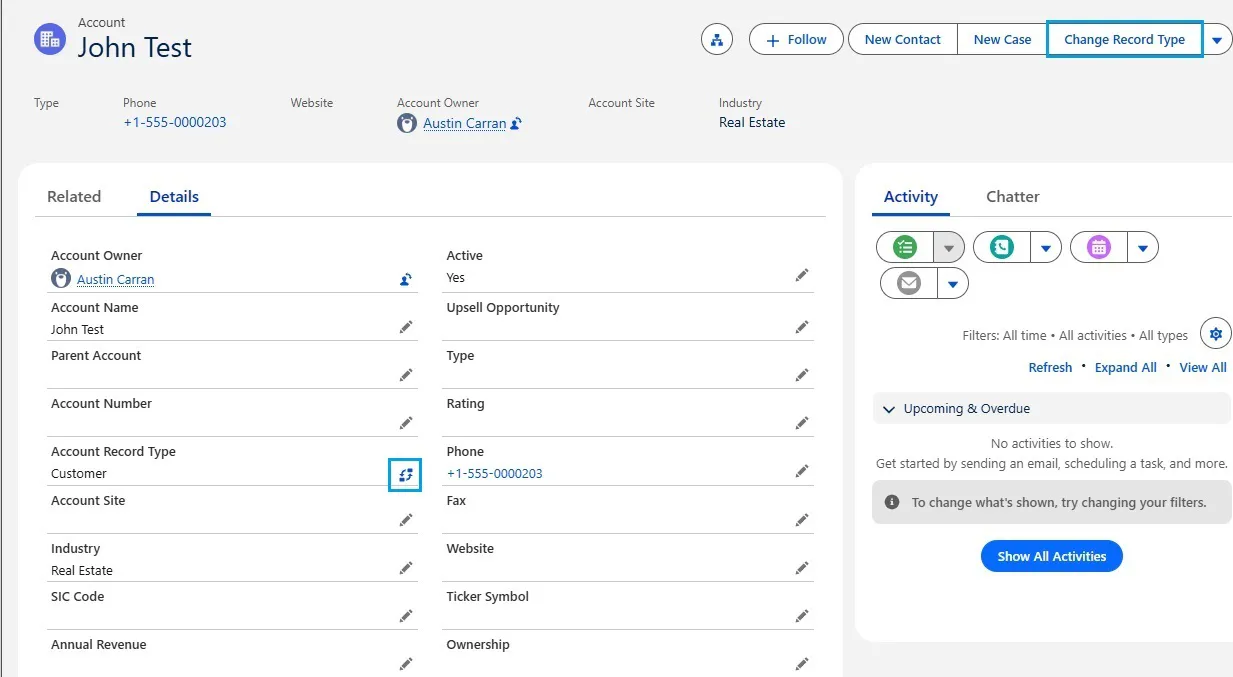
Click on the “Change Record Type” action on the top right action bar:

-
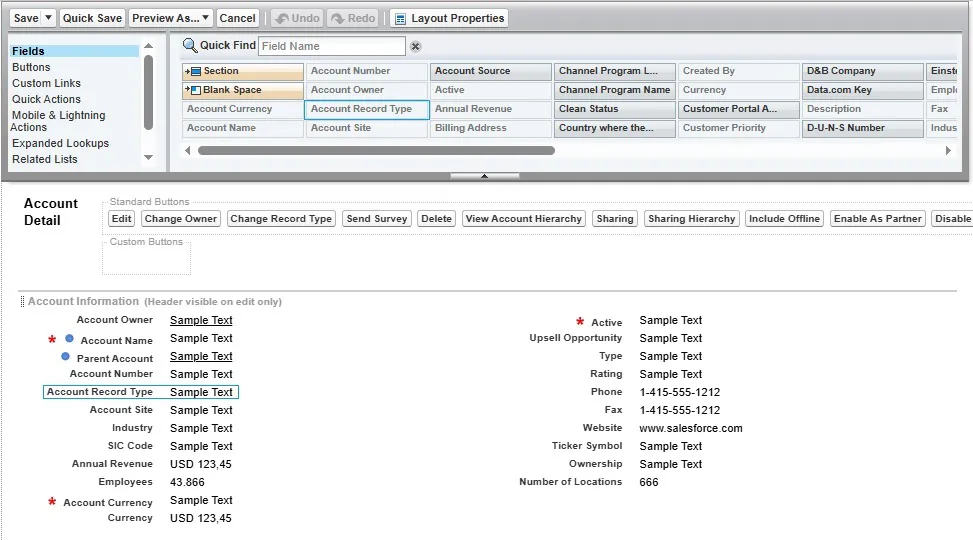
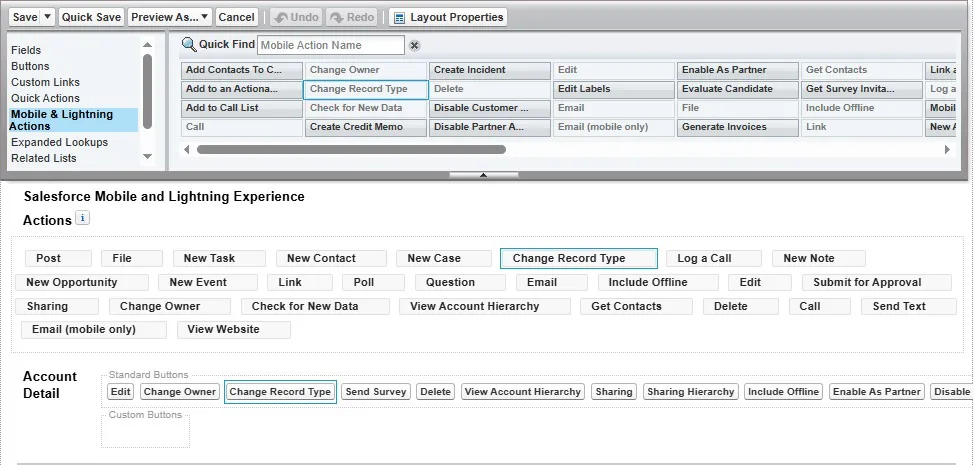
Add the “[Object] Record Type” field under Fields:
-
Add the “Change Record Type” Action under Mobile & Lightning Actions:
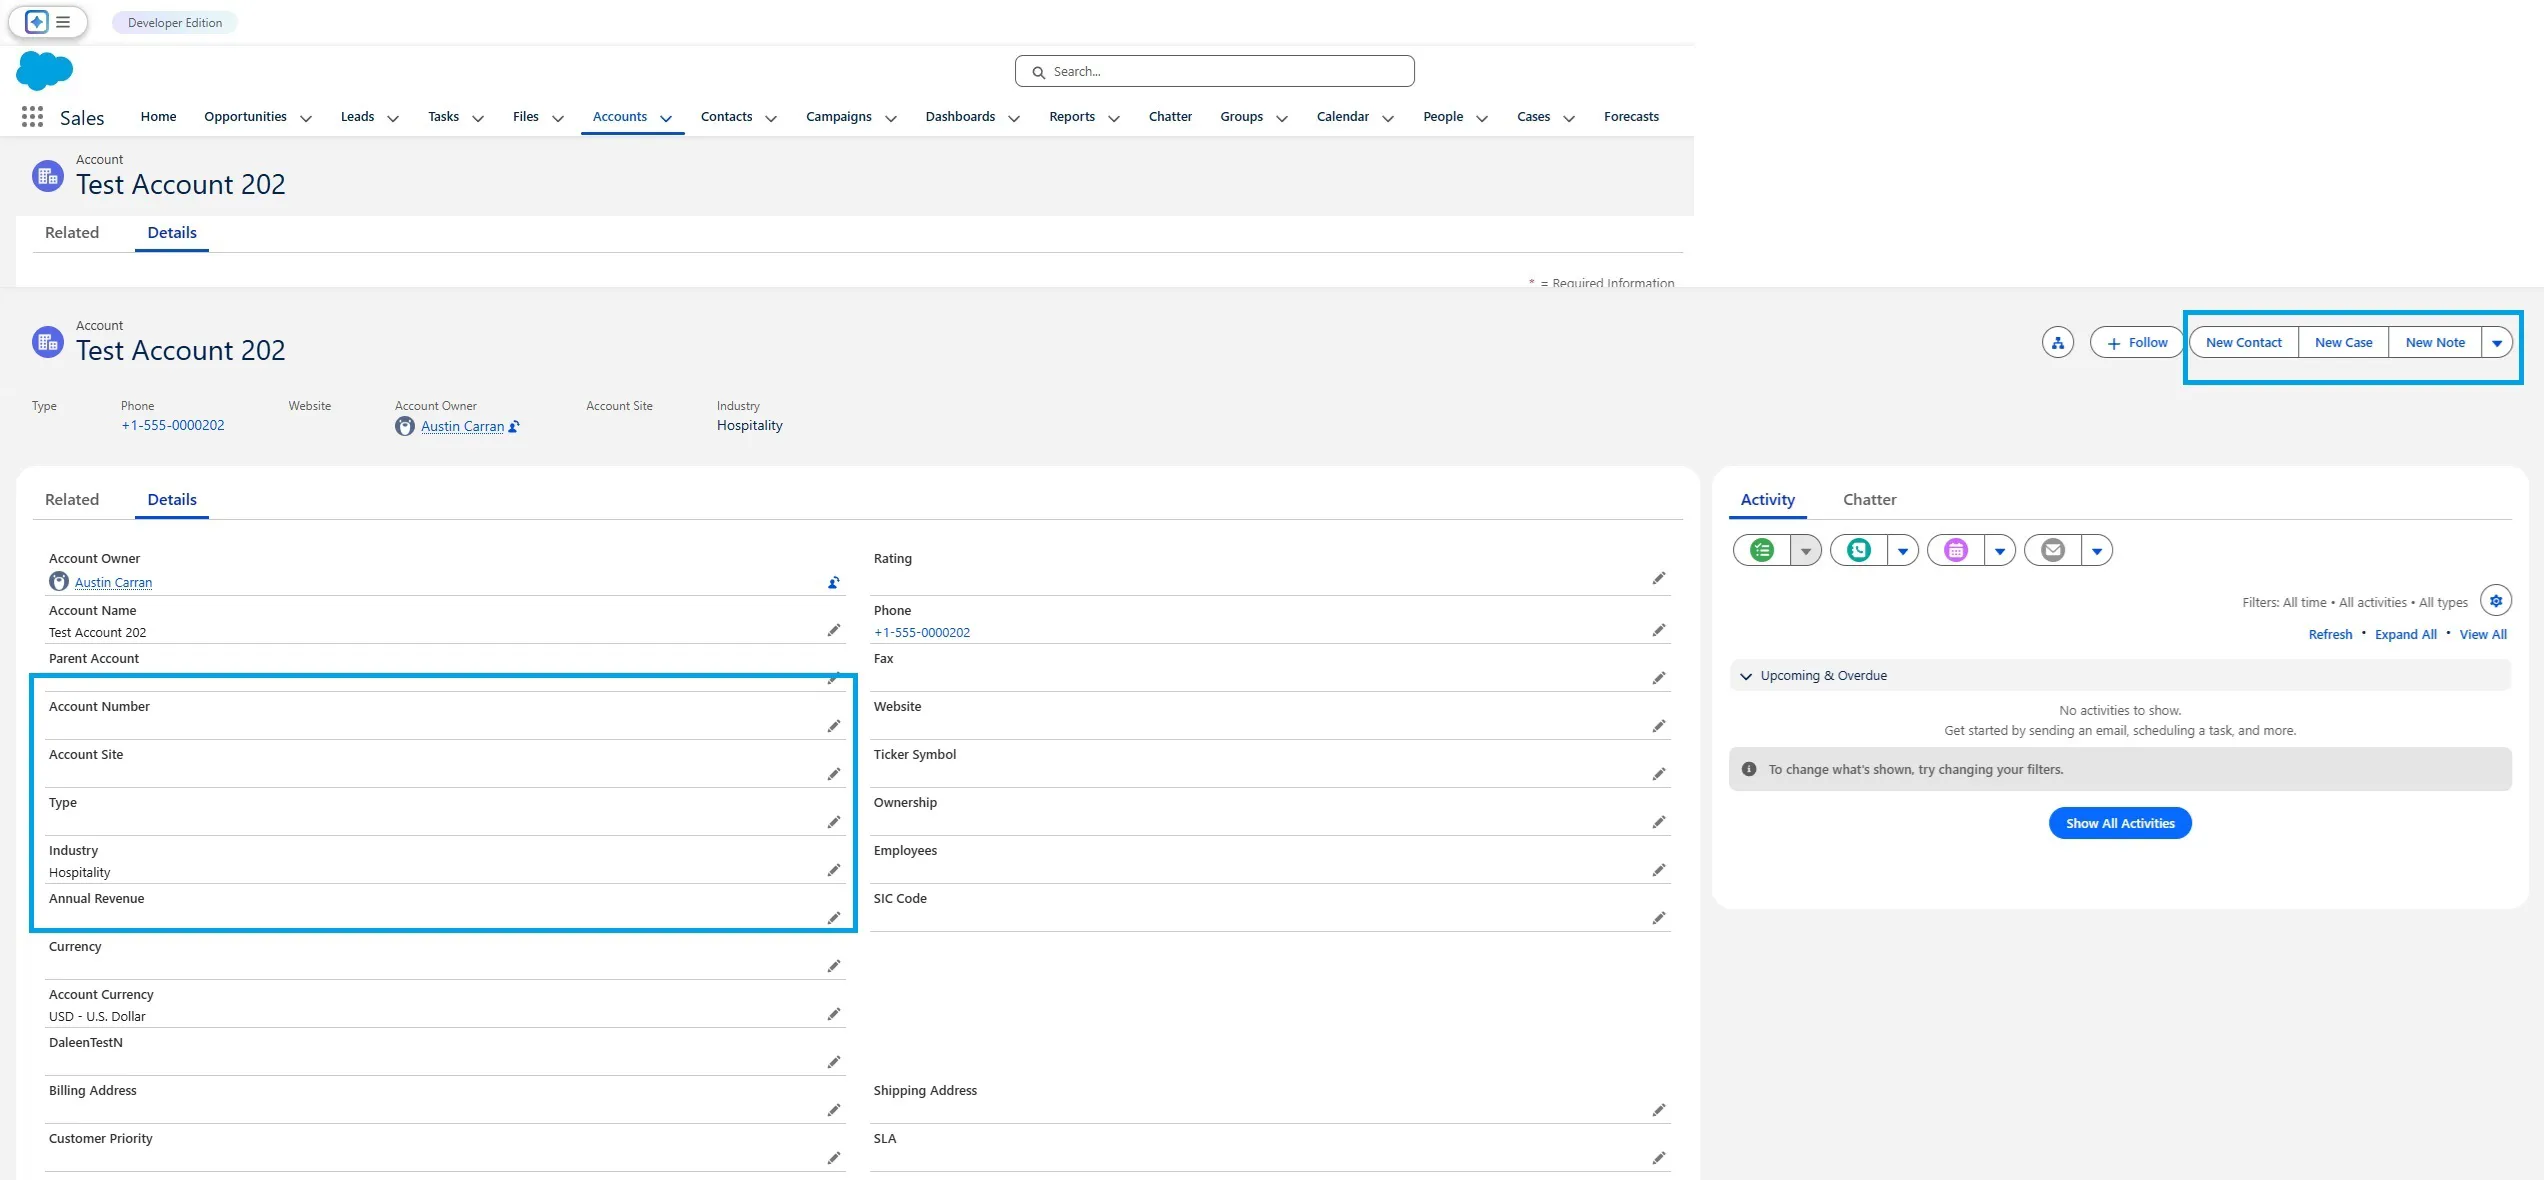
Now, to make sure it was correctly added:
- Refresh the record’s page;
- Check if the action and/or field were added to the record’s layout;
- Ensure the user has access to more than one record type.
Method 2: Bulk Change Record Type
Changing the Record Type of existing records in bulk requires updating the RecordTypeId field on each record with Data Loader or similar apps.
Steps
-
1
Find the target RecordTypeId.
Setup → Object Manager → [Object] → Record Types → Click the record type → Copy: -
2
Export the Record Id’s for the records you want to change;
-
3
Update those records using Data Loader.

Existing Records Using Master Record Type
Permissions Checklist
- Edit access to the object. Users will not be able to modify their records regardless of Record Type assignment, meaning that the “Change Record Type” option will not be available.
- Record-level access. If not assigned, users will not be able to create new records with that Record Type.
- Access to the target Record Type via profile or permission sets. Without this, users will not be able to create or edit Record Types since the option will not be available.
Why Record Type Changes Sometimes Fail
Most failures fall into these predictable categories:
Picklist mismatch: Values must exist in the master picklist and be enabled for the target record type. If you assign a Record Type with a restricted picklist to a record that has an existing value no longer permitted there, the operation will fail. Always check your picklist values in Object Manager before switching record types in bulk.
Validation rules and automation: Flows, validation rules, and triggers run when a record is saved and may block a record type change if their conditions are not met.
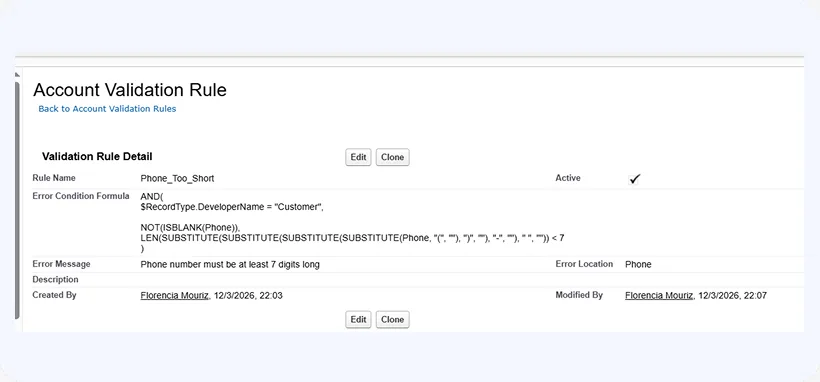
This example shows a validation rule that defines those conditions:
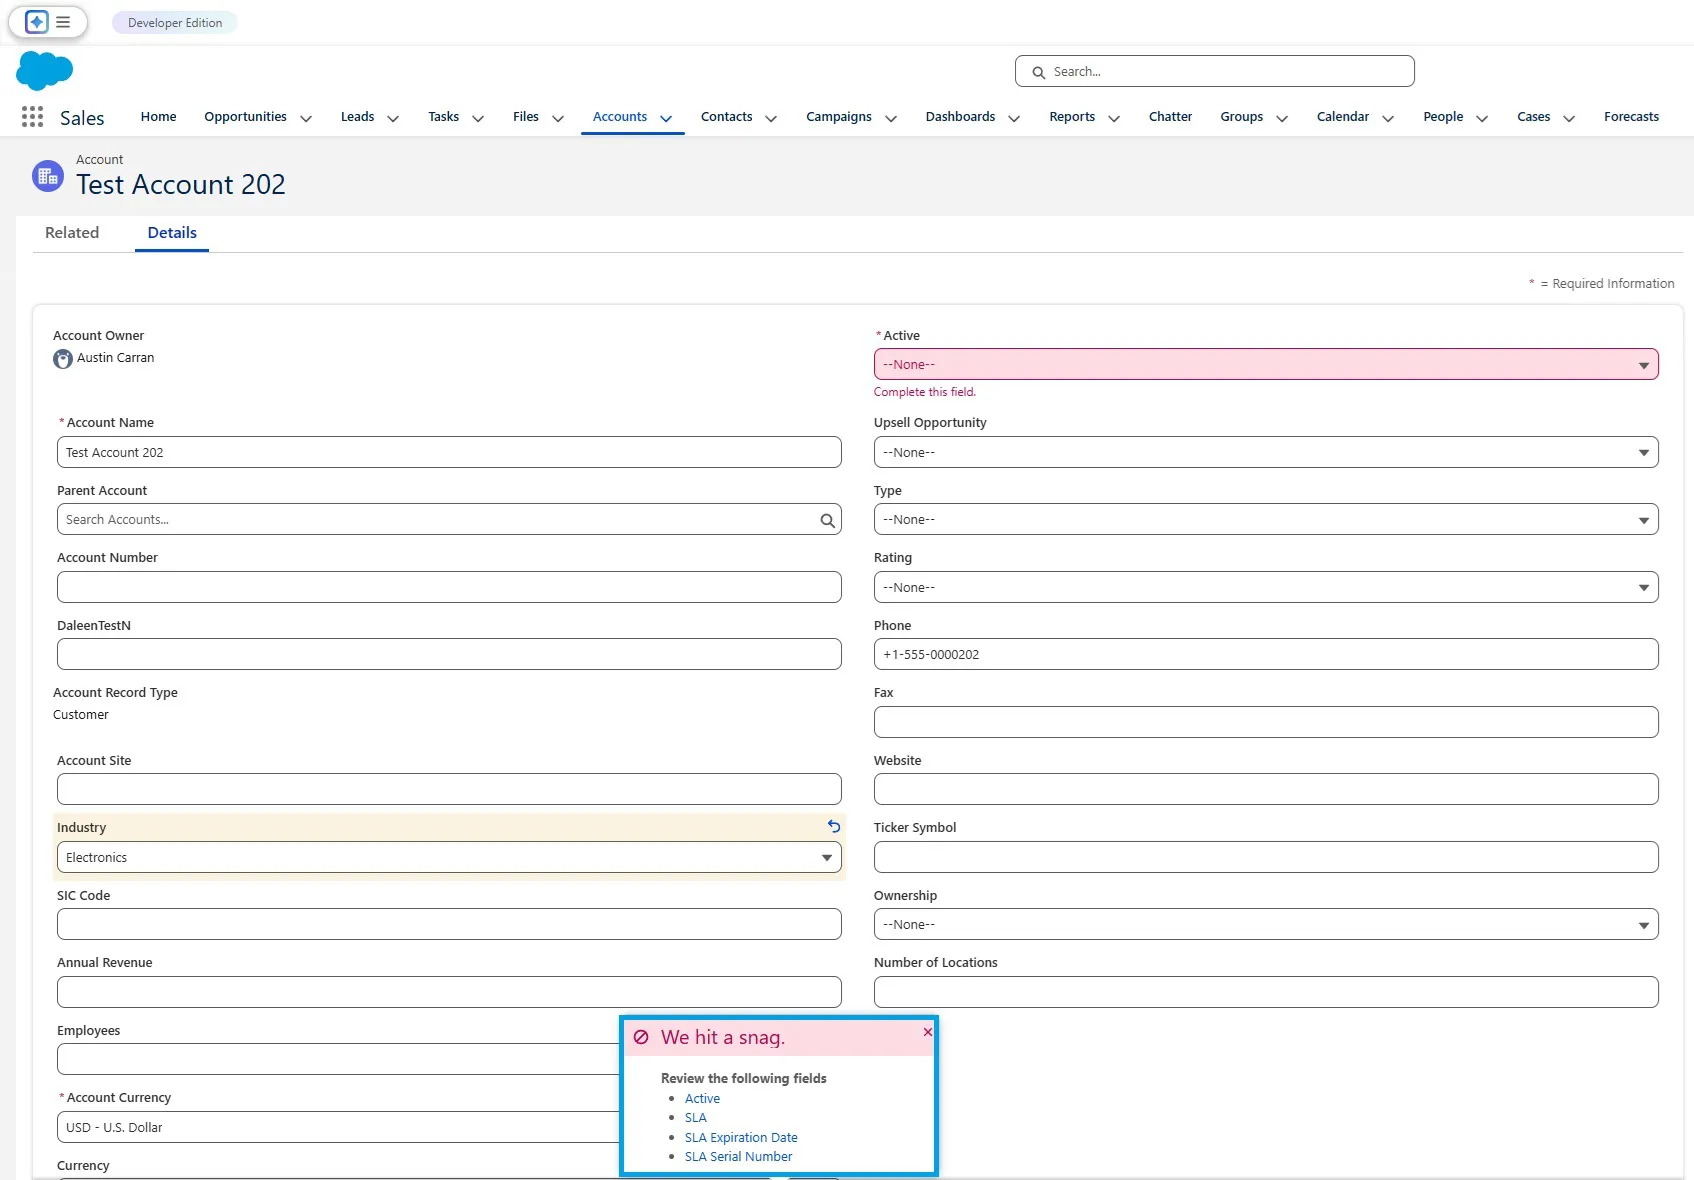
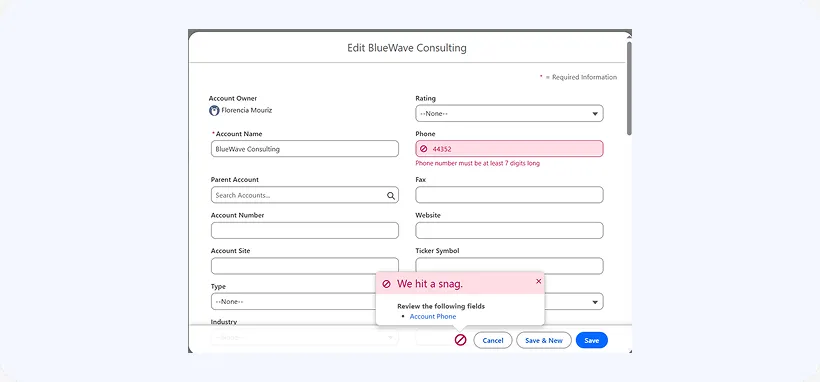
When those conditions are not met, users will see an error and won’t be able to save the record:
Tip
Always review active automation before performing bulk updates.
Business vs Person Account: Changing between Business and Person Account record types requires API tools and cannot be done from the standard Lightning UI. This should be tested and handled with care in a Sandbox first.
One-way change issue: If changing from Record Type A to B works, but B to A does not, check Record Type assignments and layout settings. The “Change Record Type” action may not have been included on the record’s layout, or a user may not have access to it. It’s recommended to check both when this type of issue appears.
Tip
When Spreadsheet-Based Updates Are Safer
Conclusion
Agustín Carranza
Customer Support & Quality Assurance Specialist
Agustín Carranza is a Customer Support and Quality Assurance Specialist at Xappex. With over 4 years of experience across customer service, technical support, backoffice operations, team leadership, and QA, he brings a well-rounded perspective to helping users solve real problems efficiently.
His background in Systems Engineering, combined with hands-on knowledge of programming, data analysis, MySQL, and Python, allows him to understand both the technical and human sides of support. He holds a Cambridge English certification, reflecting his commitment to clear and professional communication.
Agustín is dedicated to improving customer satisfaction and ensuring service excellence — values that guide both his support work and the content he creates for the Xappex blog.