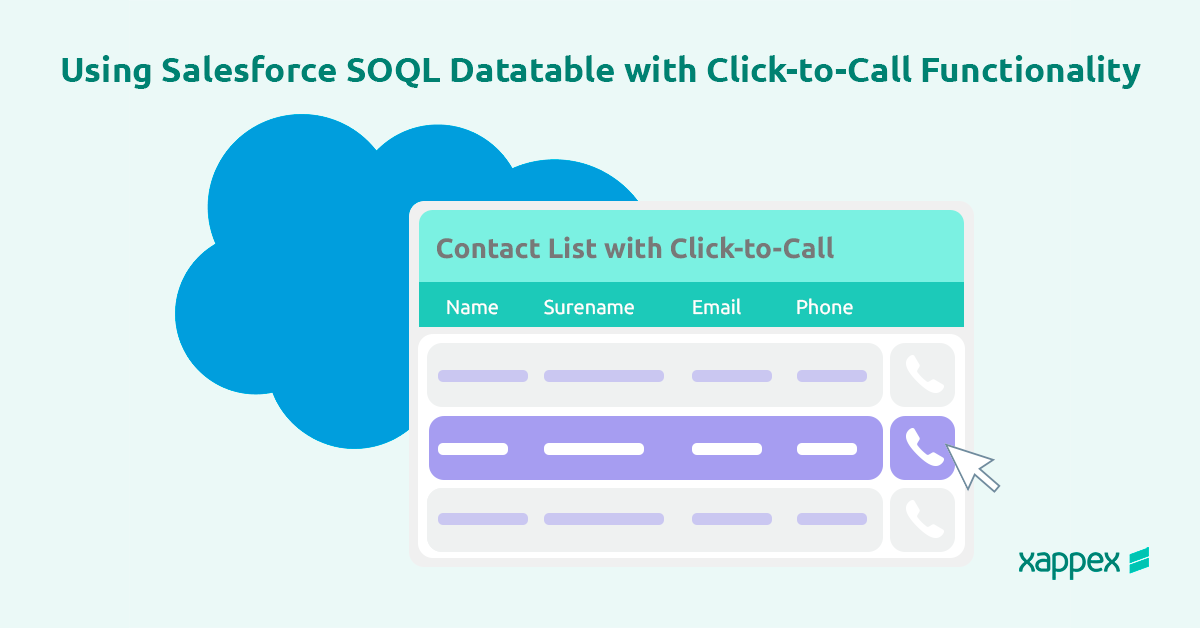
Salesforce SOQL Datatable with Click-to-Call Functionality
The Salesforce SOQL Datatable is a powerful tool for displaying Salesforce data in a dynamic, interactive table using SOQL queries. It simplifies data visualization and allows users to view, sort, and filter records easily.
When paired with Click-to-Call functionality, it becomes even more efficient by enabling users to initiate calls directly from the datatable with a single click. This integration is ideal for sales and customer service teams, streamlining communication and improving productivity within Salesforce.
What Is Click-to-Call in Salesforce SOQL Datatable?
Click-to-Call in Salesforce refers to a feature that allows users to initiate phone calls directly from a Salesforce record by clicking on a phone number field. It’s often used in conjunction with a phone system or integration (like Salesforce CTI) that connects Salesforce to a VoIP or telephony service.
When using Click-to-Call in an SOQL Datatable within Salesforce, this feature enables you to:
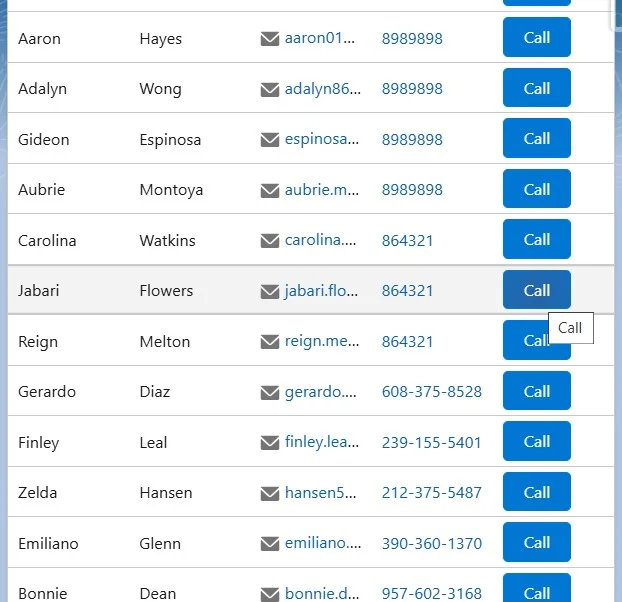
- Display Clickable Phone Numbers: Phone numbers retrieved through the SOQL query in the datatable are rendered as clickable links.
- Initiate Calls Seamlessly: Clicking a phone number triggers a call through the integrated telephony service, like Salesforce’s Open CTI or other call integrations.
How to Set Up Click-to-Call in SOQL Datatable
Create a Custom SOQL Datatable:
Build a datatable that displays key fields like phone numbers, contact names, and other essential details for client interactions.
Use a SOQL query to retrieve the necessary data, ensuring call-related fields are clearly visible for easy access.
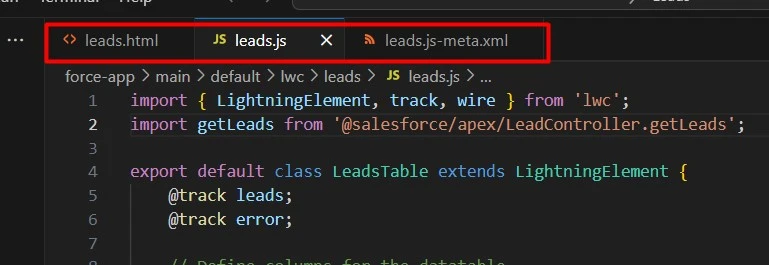
To do this, you’ll need to create a Lightning Web Component project with an HTML file, a Javascript file and an XML file to build the component.
The HTML file will display a lightning-datatable with columns for contact fields and include a button for initiating the call.
The JS file will fetch contacts using a wired Apex method and handle button clicks to initiate a phone call via the tel protocol.
The XML file will mark the component as usable in App Builder pages.
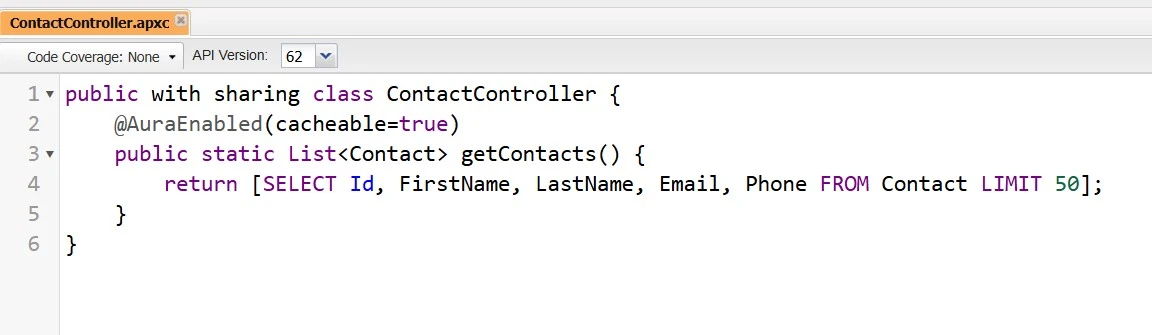
You’ll also need to create an Apex class in the Developer Console to provide contact data using an SOQL query.
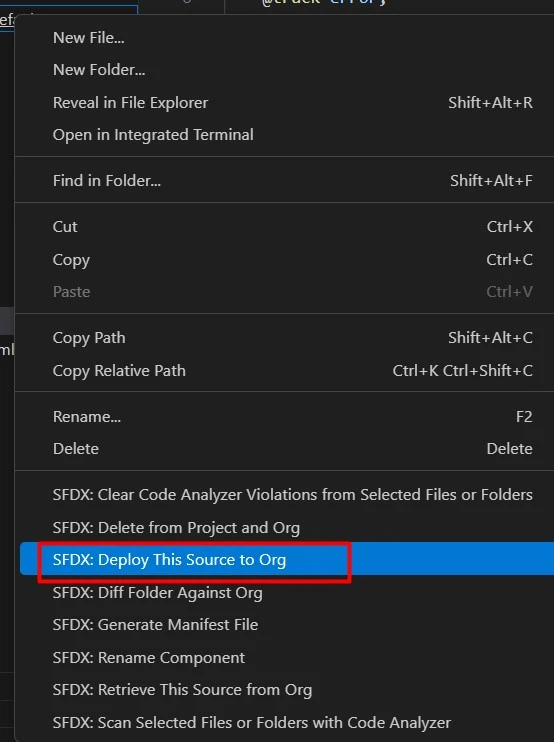
Deploy your Lightning Web Component to your Org
After building your component, deploy it to your org to be able to add it in the Page Builder.
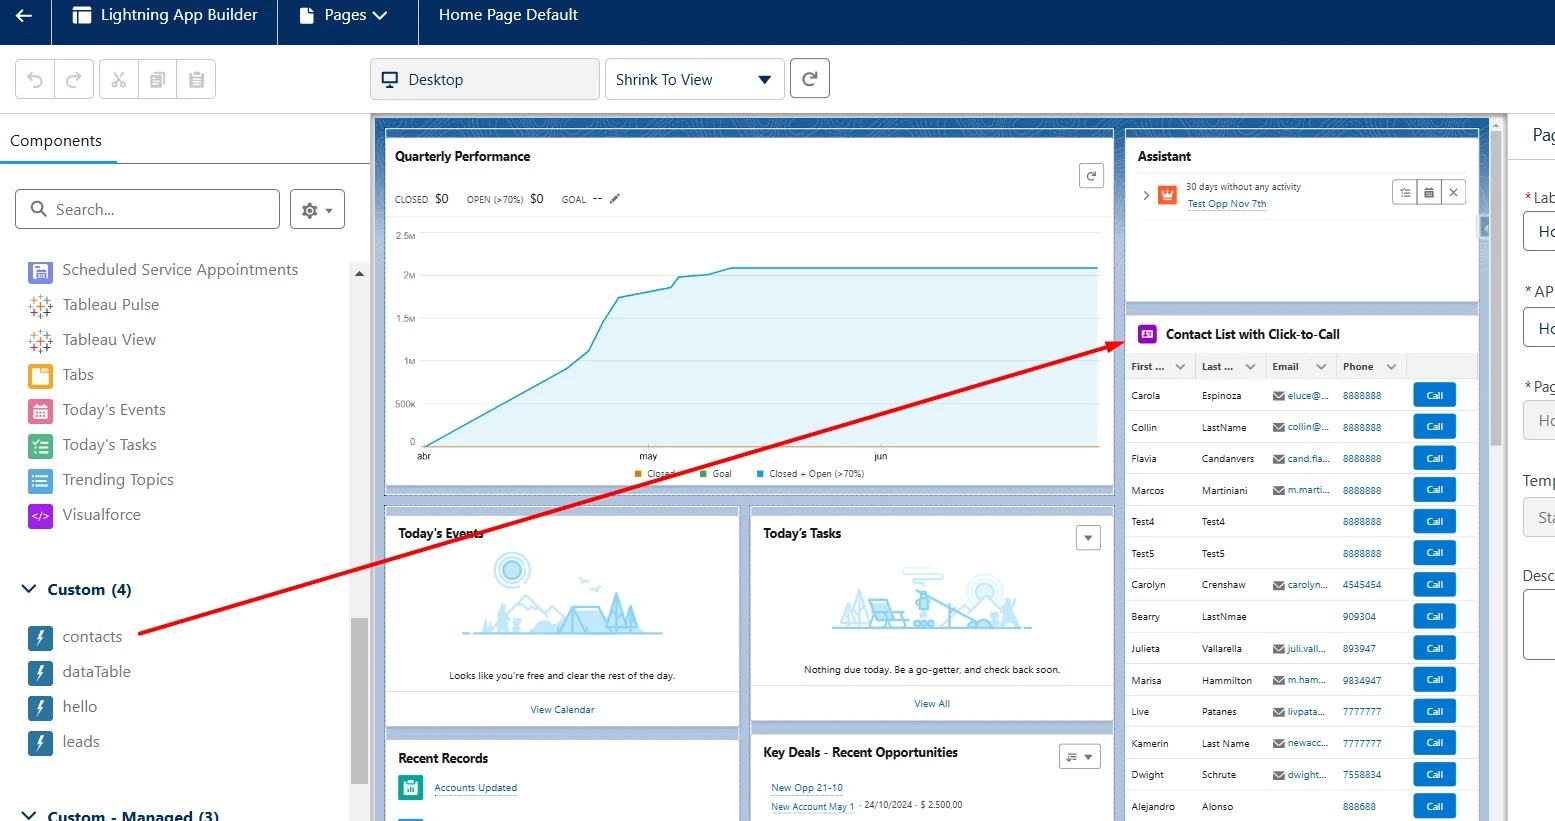
Add the component to the page you need:
Go to the Lightning App Builder of your page and find your Lightning Web Component.
Drag and drop it to the section you desire.
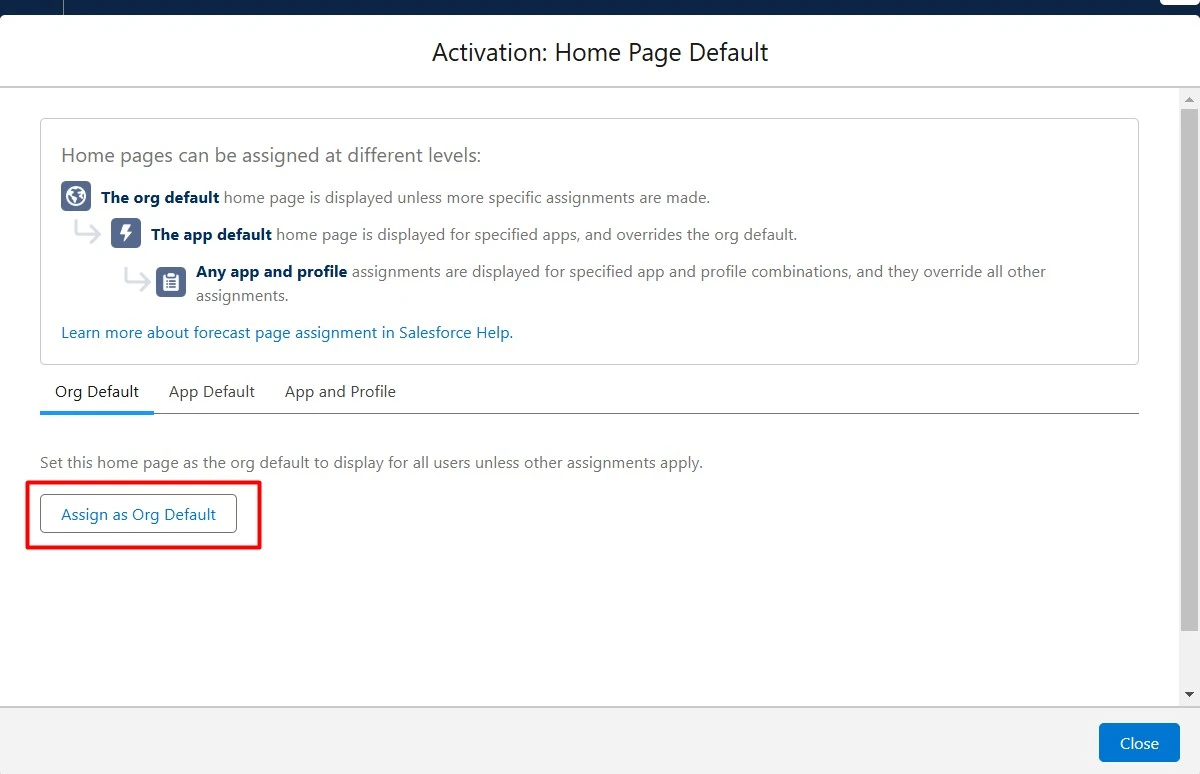
Save and Activate:
Save your page and activate the page by assigning it as Org Default.
Test:
Once added to your page, conduct test calls from various records to verify that the Click-to-Call feature works without issues. Ensure phone number formats are compatible.
By following these steps, you ensure a seamless setup of Click-to-Call functionality in your Lightning SOQL Datatable.

Florencia Mouriz
Florencia Mouriz is a professional with over two years of experience at Xappex, where she has performed as a Technical Support Agent and Coordinator, and Technical Writer. In this role, Florencia provides support to customers while creating educational content and tutorials that guide users through the implementation of Xappex tools with Salesforce. Her contributions seek to enhance customer understanding and optimize the use of these tools.
Before joining Xappex, Florencia gained valuable experience participating in diverse projects for other companies, where she worked as a Salesforce Administrator and implemented Vlocity solutions. She has an extensive background in Salesforce ecosystems and is determined to deliver impactful results for our company.
Based in Tandil, Bs As, Argentina
To learn more about Florencia’s experience and connect with her, visit her LinkedIn profile