How to Create a Custom Report in Salesforce (Lightning & Classic)
Custom Reports in Salesforce let you answer real business questions instead of relying only on standard dashboards. In this guide, you’ll learn how to create a custom report in Salesforce Lightning and Classic, how report types work, and a few practical tips to avoid common mistakes.
Before you Start
To avoid common roadblocks like missing buttons or hidden fields, it’s important to verify your setup before you begin building.
Permissions
Before you create a custom report in Salesforce, check your permissions. You’ll usually need:
- Run Reports
- Create and Customize Report
- Report Builder (Lightning)
These permissions are needed to:
- Open existing reports
- Build new reports
- Edit filters, columns, and grouping
- Schedule and export report in both Lightning and Classic
If you don’t see the New Report button, or get an “insufficient privileges” error, ask your admin to adjust your profile or add a permission set.
Report types
Every Salesforce report is based on a Report Type, which defines:
- Which object you can access
- Which fields you can add to the report
- Which relationships are available (for example, Opportunities with Products)
There are two main types of reports:
- Standard Report Types: stock reports created automatically by Salesforce, like Opportunities or Accounts & Contacts.
- Custom Report Types: Created by admins to fit business needs and expose extra relationships and fields.
Most of the time if you can’t find a field on the report, the problem lies on the report type, not the filters of the report.
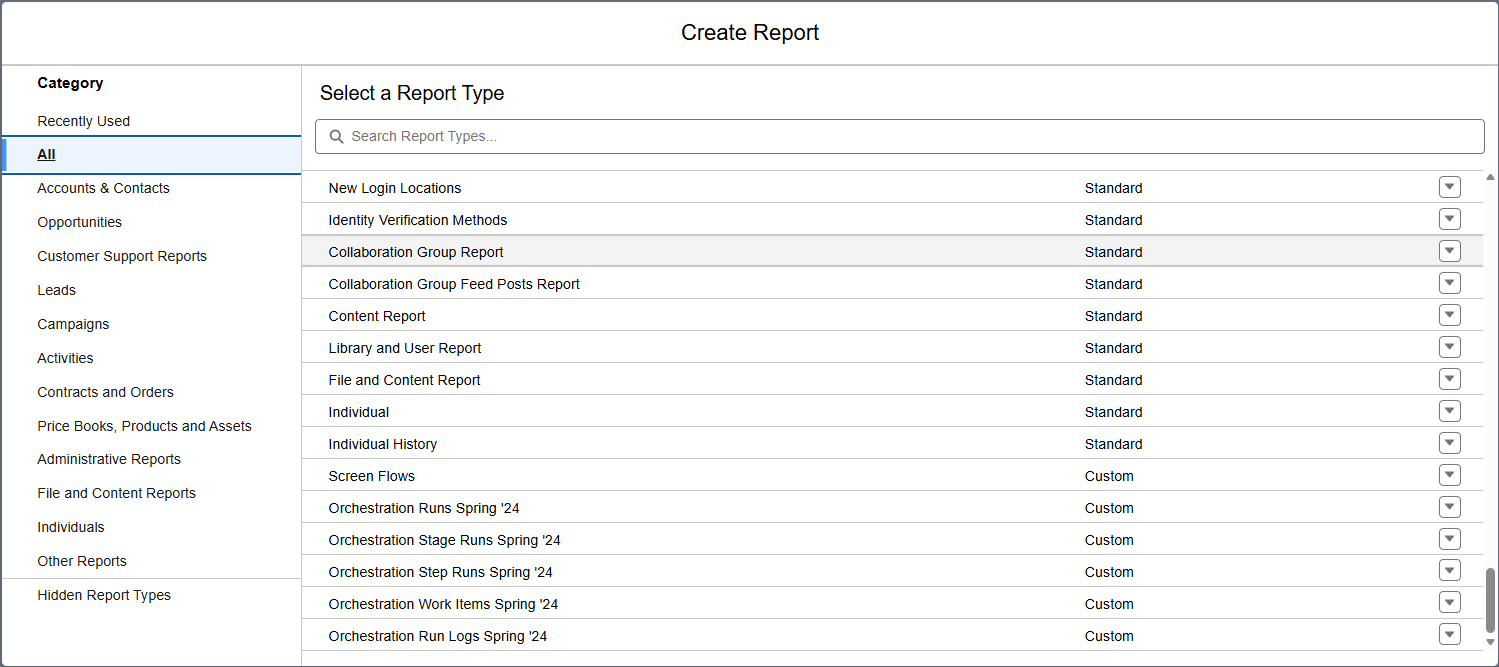
How to find available Report Types
- Go to Reports and click New Report
- In the New Report dialog, you will see a list of standard and custom reports types, select one.
You can use keywords like “Opportunities” or “Campaigns” to filter the list.
Each report type designs which objects and relationships you can use. For example Opportunities with Products lets you report on both Opportunities and Products.
If you still can’t get the data you want, you may need to create a different Custom Report Type or even a Deluxe Custom Report Type, which can include extra lookup fields across related objects.
How to create a Custom Report in Salesforce Lightning
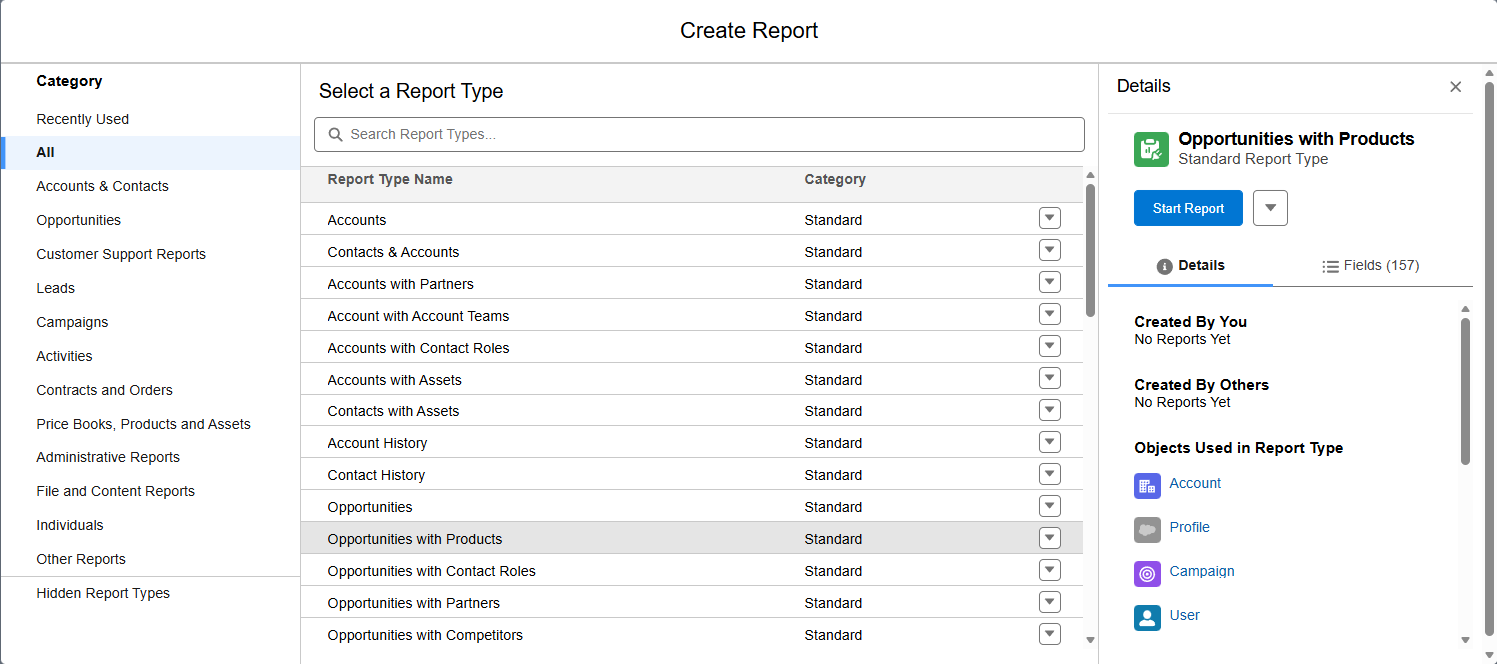
Step 1- Create a New Report
- Navigate to Reports and select New Report

- Search and select a Report Type (Opportunities or Opportunities with Products)
- Click Start Report
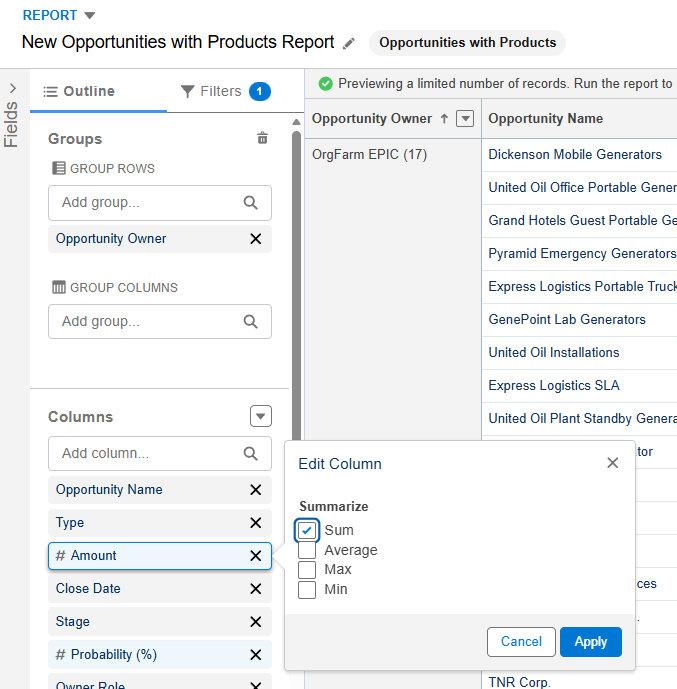
Step 2 – Customize Using the Report Builder
In the Lightning Report Builder you’ll see:
- Fields: all the fields from your report type
- Outline: visible columns and row grouping
- Filters: which records will be included in the report
- Preview: sample data
Example: a simple pipeline report:
- Adjust the filters:
- Show me = All opportunities
- Close Date = Current Fiscal Quarter
- Territories = All
- Opportunity Status = Open
- Probability = Al

- Then set you outline:
- Group Rows by Opportunity Owner
- Add the amount and choose Summarize by Sum and click Apply
Step 3 – Save and Run the Report
- Click Save and Run
- Add a name to the Report
- Choose what folder to save it to (this controls the access)
- Click Save

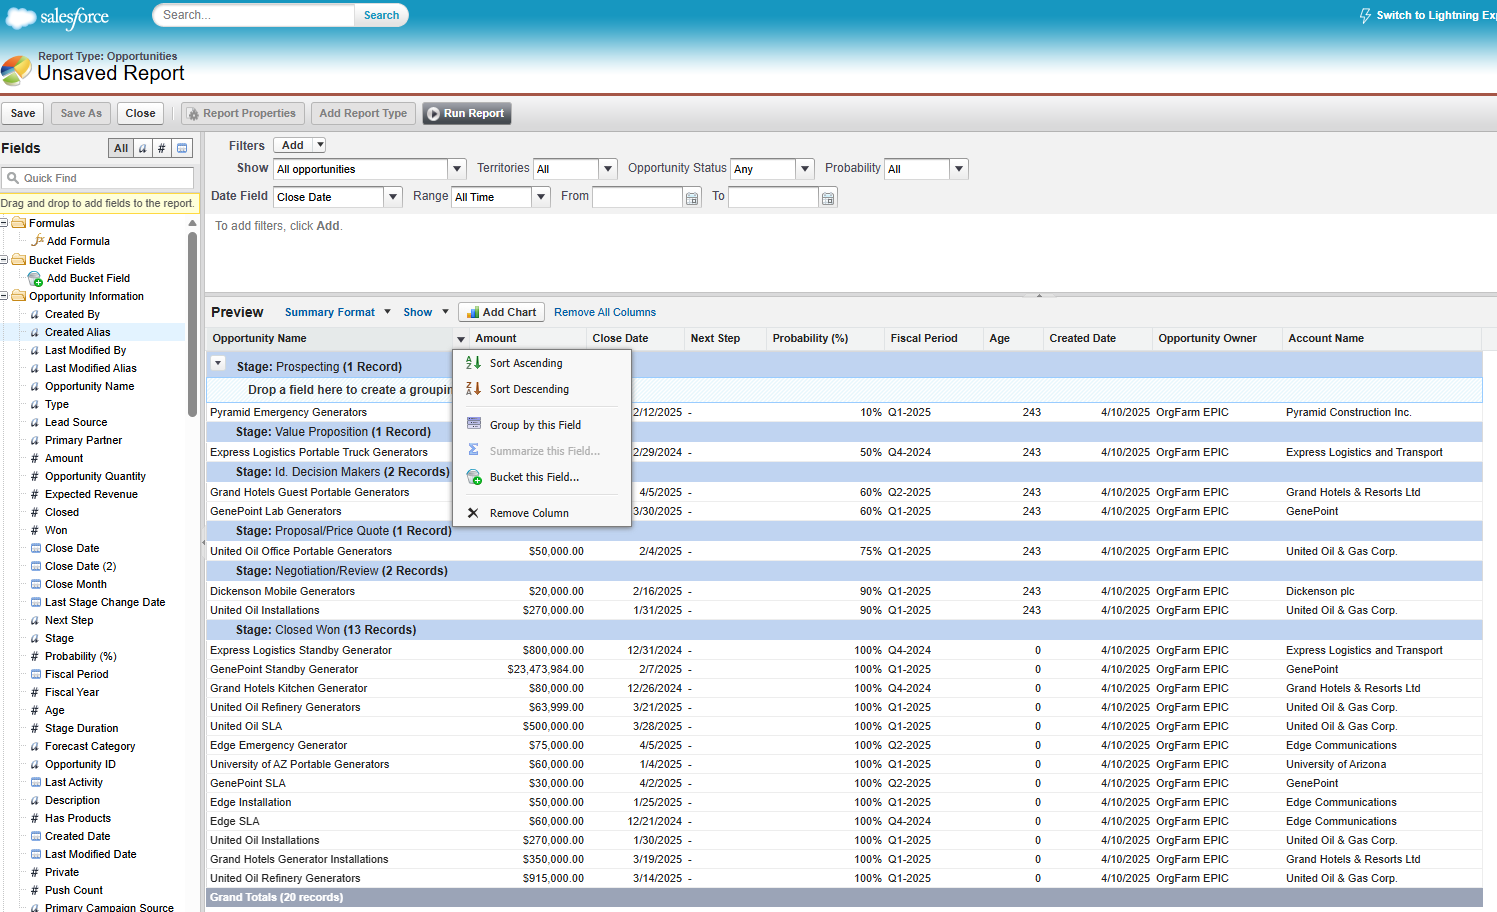
How to Create a Custom Report in Salesforce Classic
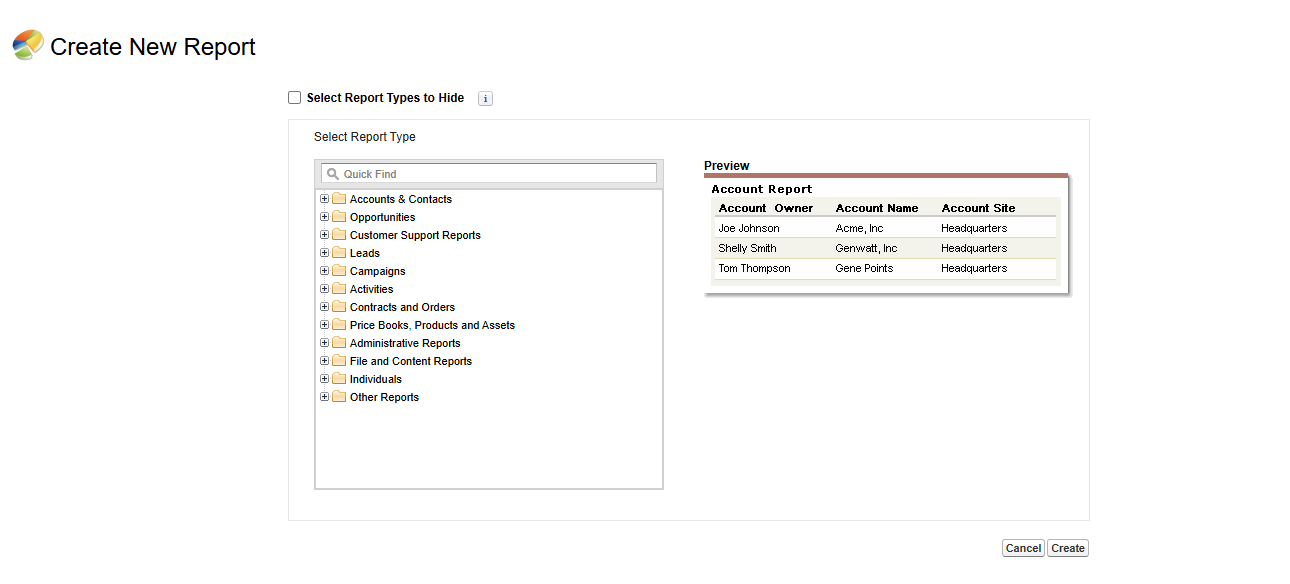
- Go to Reports tab
- Click New Report
- Choose a Report Type and click Create
- Add or remove columns by dragging and dropping the field options on the left panel
- Add filters by dragging and dropping fields or clicking add in the filters panel then set conditions.
- Group needed fields by selecting the group by this Field in the Field column dropdown.
- Click save, select a Folder and click on Run Report
Advanced Filters and Pro Tips
To get the most out of your Salesforce data, use advanced filtering to find specific groups of records that basic reports usually miss.
Cross Filters
Cross filters help you filter by related records without formulas.
Common use cases:
- Opportunities WITHOUT Tasks (Task status = Open) – find deals with no active follow-up tasks.
- Accounts WITH Cases (Status = Escalated) – find customers with open escalations.
Cross filters are available in both Lightning and Classic, and you can add them from the Filters pane in the Report Builder. They let you include or exclude records based on related data, without writing formulas.
Users often run into limits when they try to report on parent records that don’t have any related child records. When that happens, a good approach is to:
- Combine Cross Filter with the WITH / WITHOUT options, or use “with/without” style Report Types if they exist in your org.
- Or rely on a roll-up summary field that counts related records and then filter where that count equals zero.
For more complex data relationships that span multiple objects, admins can use Custom Report Types or Deluxe Custom Report Types to include additional lookup fields.
Working with custom reports outside salesforce
Sometimes you need to join or analyze report data beyond the platforms built-in limits, for this you can:
- Export the report as -xlsx
- Use tools like XL-Connector to pull and combine reports directly in excel.
For more information on combining data, read our article How to Create a Joined Report in Salesforce.
Save, Share, Schedule, and Export
Once your report works:
- Save to the right folder:
- Public – visible to the whole team
- Private – only to you
- Custom/Team folders – specific roles or teams
- Share with the right access:
- View Only – to protect logic
- Edit – for full access
- Schedule reports:
- Run them daily, weekly or monthly
- Email results to stakeholders
- Export to Excel:
- Use .xlsx for deeper analysis and charts
- For advanced exports or combining multiple reports, XL-Connector can save a lot of time
Common Issues and Quick Fixes
- Missing fields: Check the Report Type first.
- No data returned: Review filters, specially data range, stage and owner.
- Totals look wrong: Check your grouping and confirm you are summarizing the right field
- Missing related data: Your org may use Deluxe Custom Report Types; ask your admin which relationships are exposed.
Conclusion
You now know how to create a custom report in Salesforce Lightning and Classic, how to pick the right report type, and how to use filters and cross filters to get the data you need. Start with a clear question, choose the right report type, and keep your layout simple. When you outgrow Salesforce’s built-in reports, export to Excel or use XL-Connector and joined reports for deeper analysis.

Xappex CRM data management solutions

G-Connector for Salesforce
Connect your Salesforce data to Google Sheets in a two-way sync.

XL-Connector for Salesforce
Connect and export your Salesforce data to Excel.

Looker Studio for Salesforce
Connect Salesforce reports and queries to your Google Data Studio dashboards.

Excel Merge
Calculate advanced Excel models. Generate Excel documents based on Salesforce data. All with a single click from a Salesforce record page.

XL-Connector 365
Connect and sync Microsoft Excel on all platforms with Salesforce.