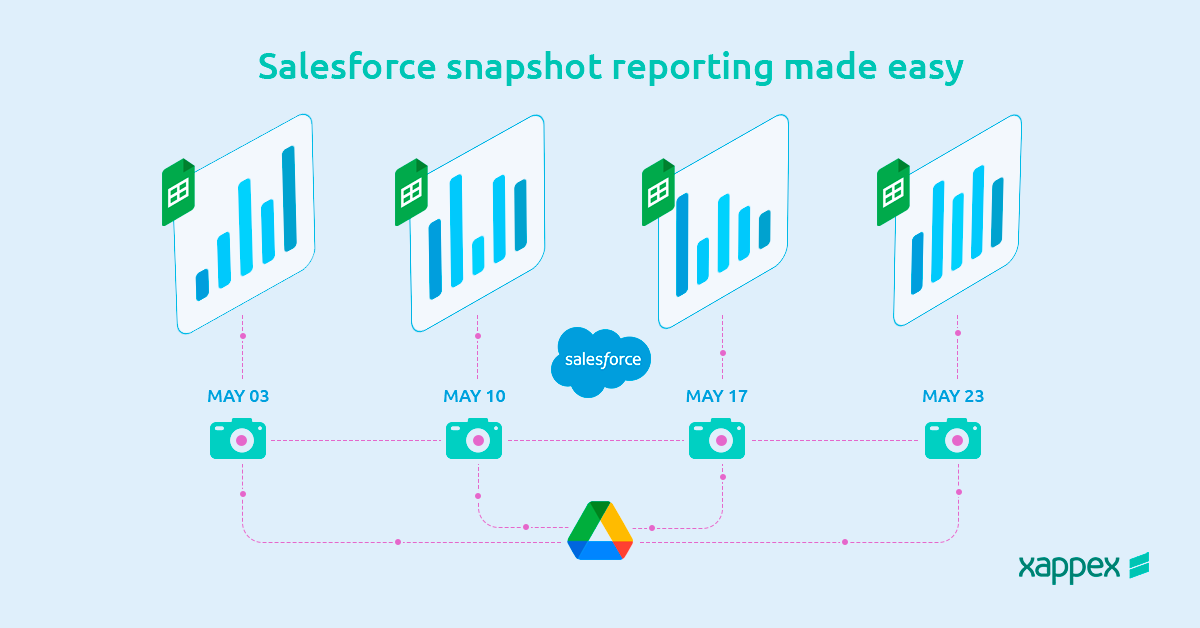
Imagine capturing a crystal-clear image of your Salesforce report data at a specific moment in time. Reporting Snapshots do exactly that. This frozen data serves as a historical benchmark, enabling you to track trends, analyze changes over extended periods, and compare past performance against current results.
To make smart decisions and stay compliant, Salesforce users must keep track of their past data and report on it. This article will help you understand the best ways to do this with Salesforce snapshot reporting.
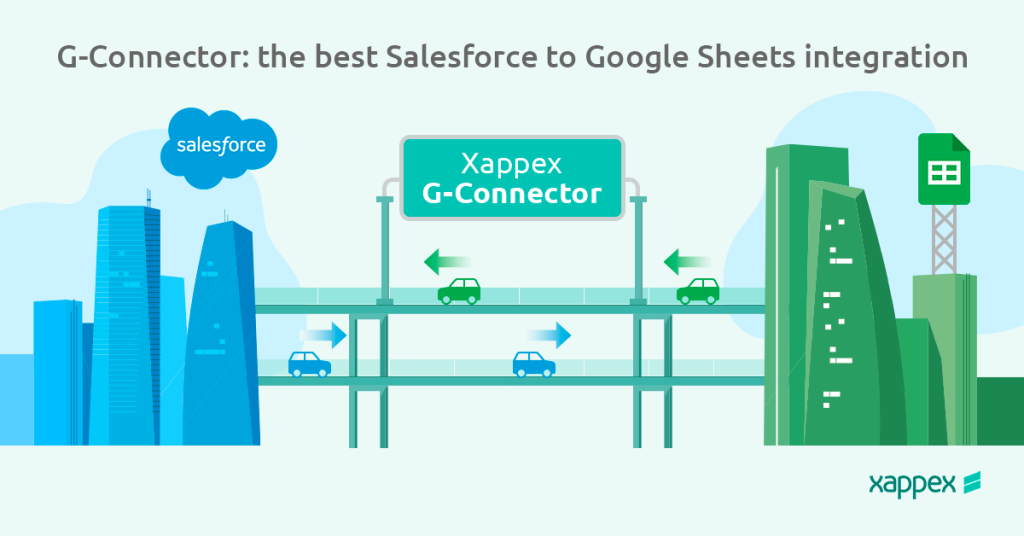
We’ll show you how to set it up, deal with any issues you might run into, and even introduce you to tools like Xappex’s G-Connector, which are a great alternative to the native Salesforce functionality and greatly improve the process.
How to set up a Salesforce snapshot report?
Sure, Salesforce has great reporting tools, but Snapshot reports can be a bit tricky to set up. First, you must create a whole new object to store the snapshot data. Then, you have to carefully map all the fields one by one to ensure the information from your report is in the right place.
Finally, scheduling the snapshot adds another step that takes you outside the standard report builder. If you’re new to Salesforce, these extra steps make setting up Snapshot reports a bit of a hassle.
For a detailed, step-by-step guide on configuring Reporting Snapshots in Salesforce, please refer to the following resources:
https://help.salesforce.com/s/articleView?id=sf.data_scheduling_analytic_snap.htm&type=5
Salesforce snapshot reporting limitations
Salesforce snapshot reporting provides useful information; however, it has certain limitations.
- Reporting snapshots can add up to 2000 new records to the target object. If more than 2000 new records are added, the additional rows are not recorded and a notification displays that some rows have failed.
- When you have a specific field in the target object that needs to be unique, if the report contains multiple records with the same values in that field’s column, duplicate records will not be added. The run history will show when records are not included in the reporting snapshot.
- The target object should not have validation rules or Apex triggers that fire on record creation (Insert trigger).
- Selecting more than 100 columns in the Source report is impossible.
- The maximum number of custom fields that a Target Object can have is 100.
- You can’t easily share snapshots via Slack or Chatter, making it harder for team members to access important Salesforce data.
- Only System Administrators can set up snapshots, which means other team members can’t create or customize them on their own.
Please refer: https://help.salesforce.com/s/articleView?id=sf.data_troubleshooting_snapshots.htm&type=5
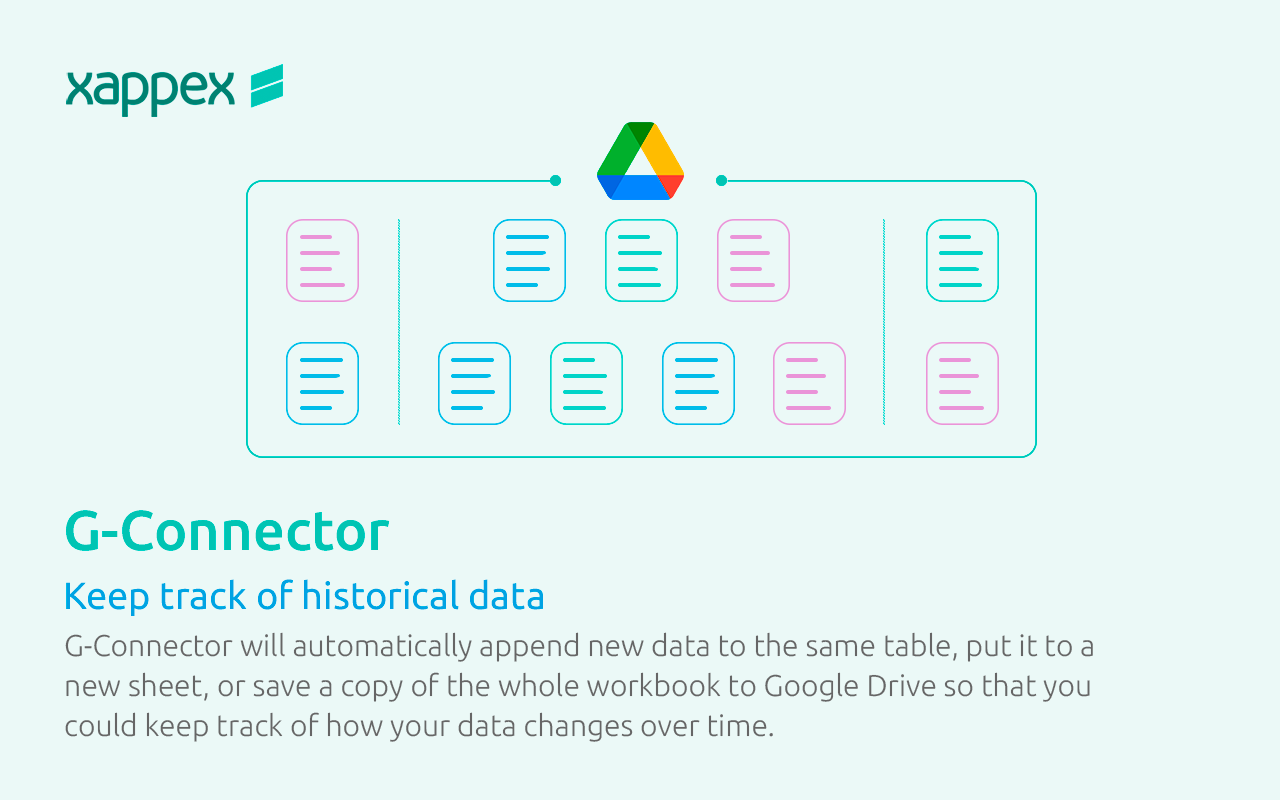
Simplify your Salesforce snapshot report with G-Connector
Tired of complex Salesforce snapshot reports in Salesforce? Xappex G-Connector for Salesforce offers a user-friendly alternative. With its intuitive UI, setting up data snapshots is a breeze. G-Connector’s flexibility lets you choose how you save your data in Google Drive, while its collaborative features break down reporting silos.
Anyone on your team, not just admins, can create and share reports. Plus, keep everyone informed with notifications sent directly within or outside your Salesforce organization.
How to easily perform snapshot reports and save them in Google Drive?
G-Connector lets you access historical data from Salesforce. It saves your spreadsheet with a timestamp in a designated Google Drive folder when set up correctly. Scheduling a snapshot after pulling data ensures you have the latest information.
-
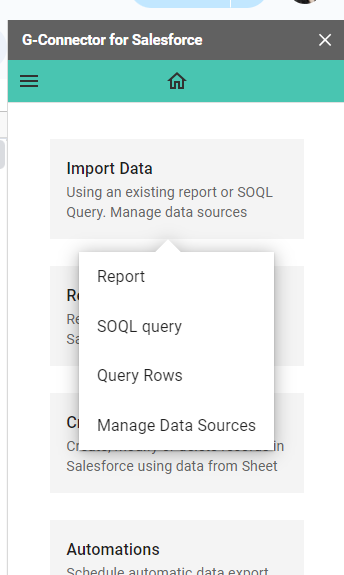
Before scheduling the saving of a snapshot as a separate file in Googe Drive, you need to pull the data into the Google Sheet you’re working in. This can be done using the Import Data button, either by pulling a pre-built Salesforce report or by building and running a custom SOQL query:

-
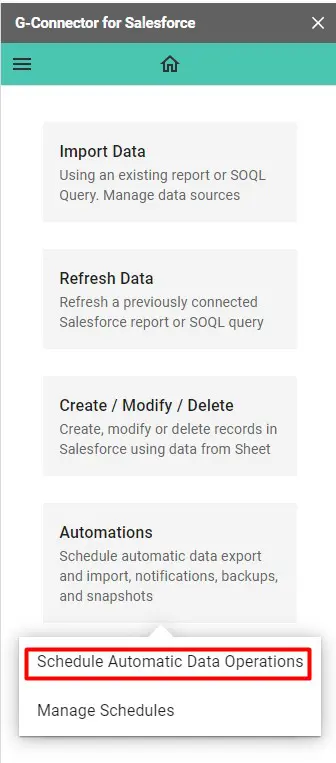
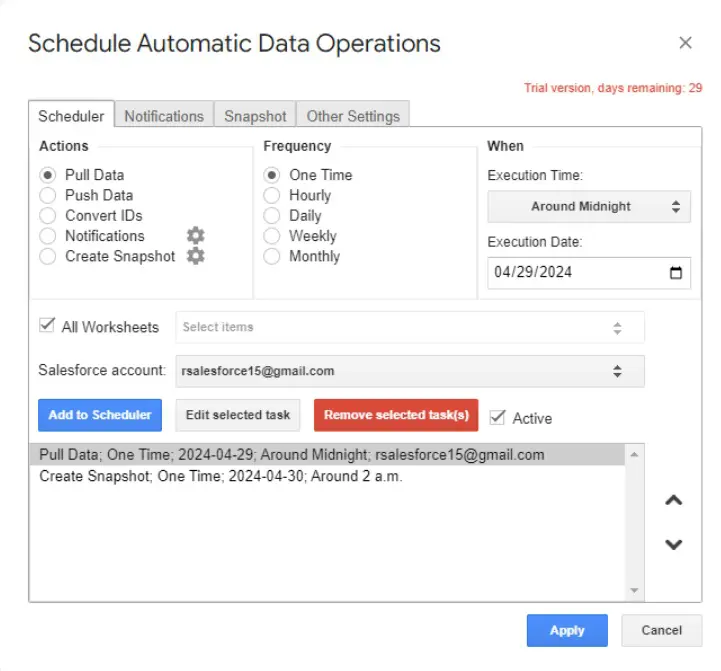
Once the data is in the spreadsheet, you can start working on the schedule to automatically refresh the data and save it as a snapshot right after.
Go to the G-Connector for the Salesforce menu and select “Schedule Automatic Data Operations”.
-
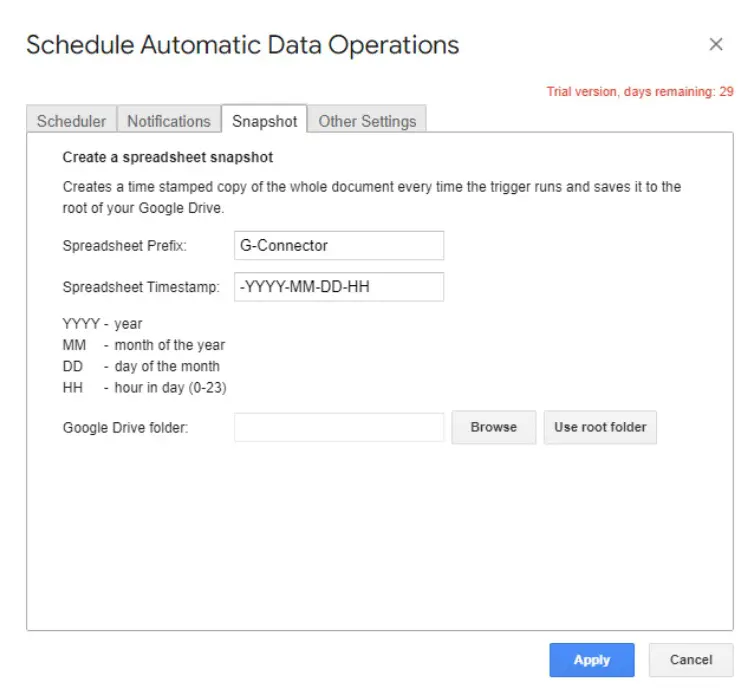
Within the scheduling options, find the Snapshot tab. This is where you’ll set up the details for your snapshot.
In the Snapshot tab, you’ll see options to define parameters such as the prefix for snapshot files, timestamp format, and the folder where the files will be saved. Customize these settings according to your preferences.
-
To capture the latest data from Salesforce, schedule the snapshot operation after pulling the data. Once you set the snapshot parameters, click “Apply” to schedule the automatic snapshot operation.
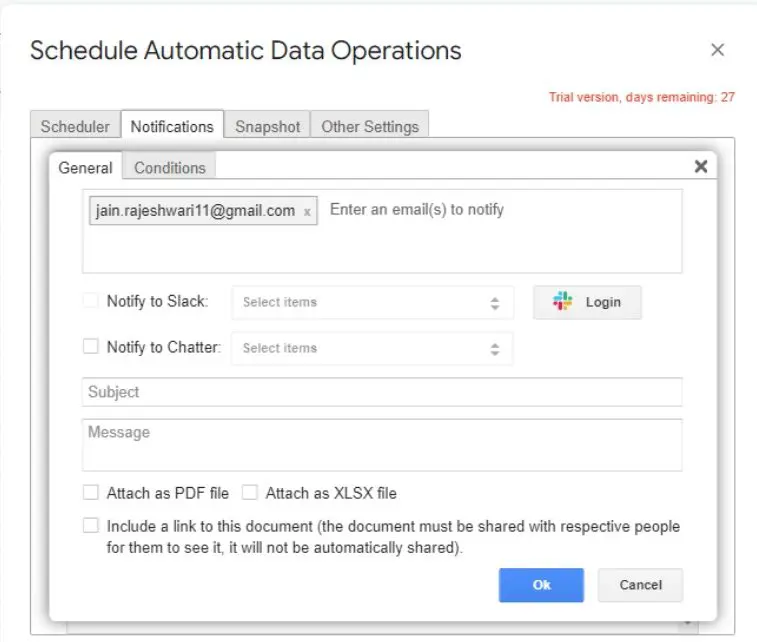
Notify your team by sharing Salesforce data snapshots
After completing automatic jobs, we can send notifications via Slack using G-connector. These notifications can be sent as email or chatter groups, as well as Slack channels.
You can easily access these message distribution channels by clicking on “Notifications” under “Schedule Automatic Data Operations”.
We can add emails and attachments to be sent in the notification tab, bypassing the need for a Salesforce license to access the reports.
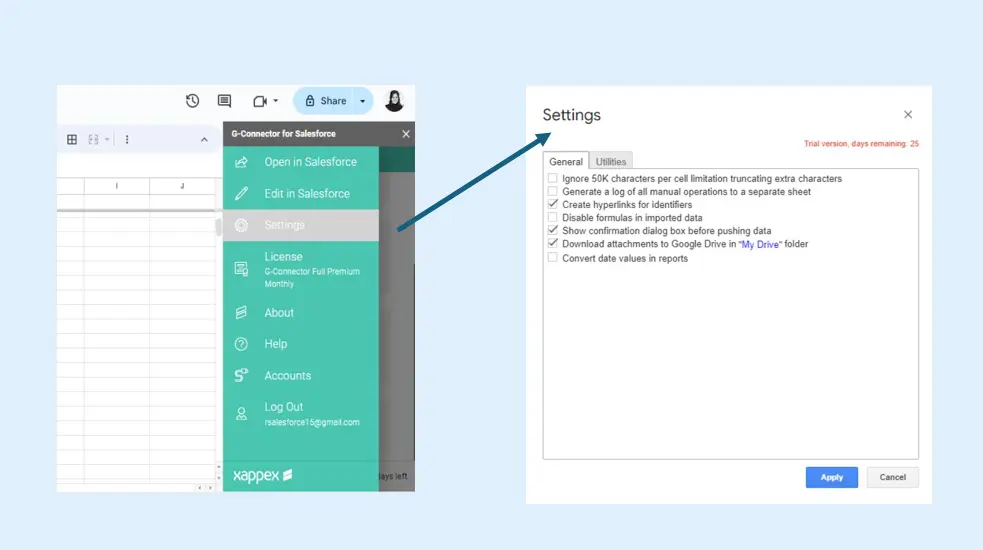
Download/upload files between Salesforce and Google Drive with G-Connector
Managing your Salesforce data is now easier than ever with Google Sheets. Mass insert, update, upsert, manage duplicates, and delete data manually or automatically with ease.
In order to enable this functionality, go to G-Connector for Salesforce, open Settings, and check the box next to the folder you want to save the files.
-
To enable this functionality, go to G-Connector for Salesforce, open Settings, and check the box next to the folder you want to save the files.
-
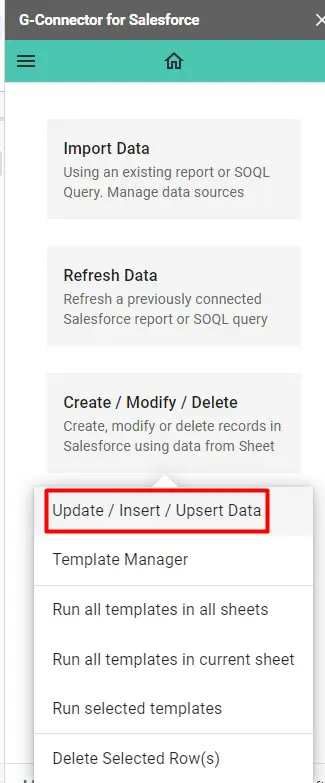
Upload data from Google Sheets to Salesforce:
Once you’re in your Google Sheet, go to the “G-Connector for Salesforce” menu and select “Update/Insert/Upsert Selected Row(s).” This will initiate the process of transferring data from Google Sheets to Salesforce.
-
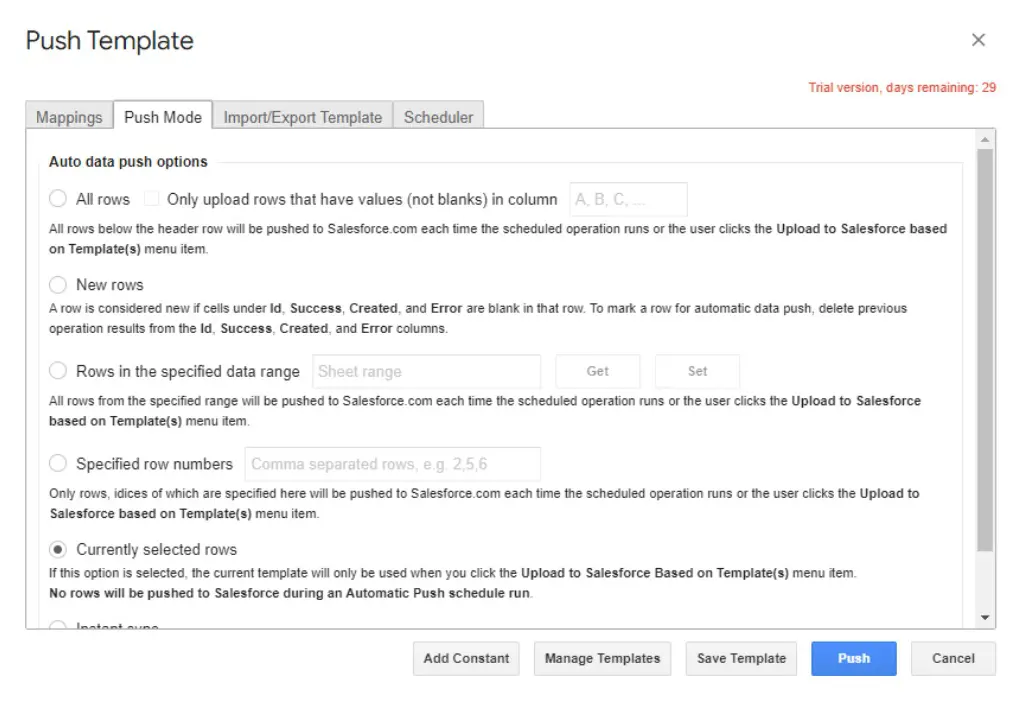
Mappings: Click on the Mapping tab, select your desired Salesforces Object and operation as “INSERT”. Then, map your Google Sheet columns with the Salesforce fields respectively.
-
In Push Mode Tab we have multiple options which can be selected as per requirement. For now, we are keeping it as “Currently Selected Rows”.
-
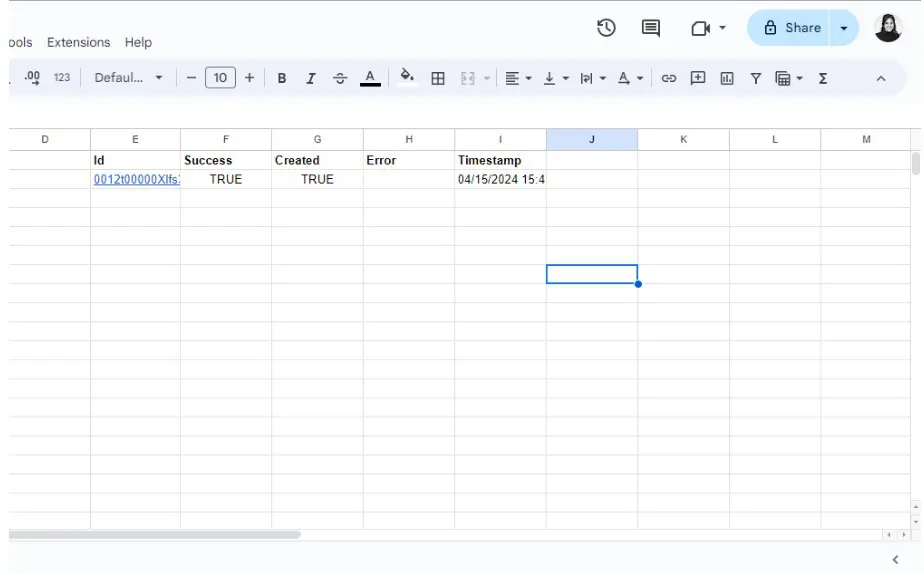
Click the Push button to insert a record in Salesforce org. Once inserted, the Google sheet will display the columns Id, Success, Created, Error, and Timestamp.
The Error column shows the description of the error when the file is not uploaded successfully.
Login to your Salesforce org to view the newly created record via G-connector. You can access the same record by clicking on the new “ID” column.
-
Retrieve Data:
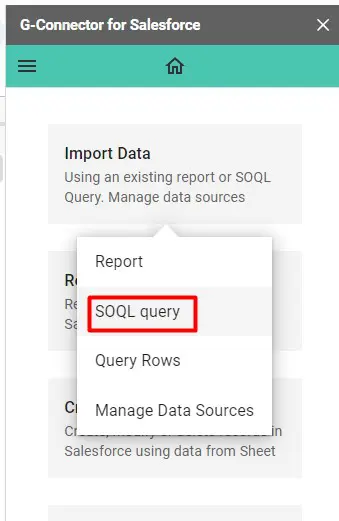
For pulling data from Salesforce and saving it on Google Sheets, click on “G-Connector for Salesforce” option and select “Import Data”–> “SOQL query.” This will open an advanced query editor within your Google Sheet, making it very convenient.
-
First, select the source data from the “From” picklist. Then, choose the fields you want to import into your Google Sheet. Please ensure that the Id field is included in the query to have unique file names. You can also filter your data using the Condition.
-
G-Connector for Salesforce offers flexible data refresh options. Users can choose to perform the following actions:
*Overwrite existing data
*Append new data to the existing sheet at the end
*Create a completely new sheet with the updated information.

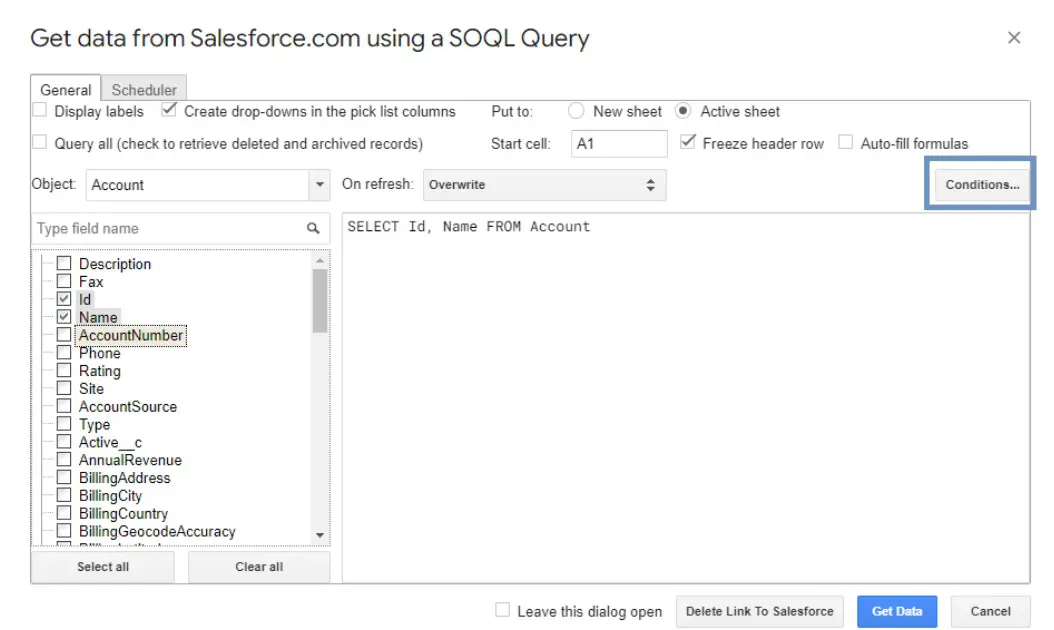

Click “Get Data” to import Salesforce data into Google Sheets.
Why G-Connector can be a great tool for keeping track of your Salesforce historical data
- Configuring automatic data snapshots in G-Connector is user-friendly. Users can conveniently schedule snapshots to occur automatically after retrieving data from Salesforce.
- The scheduling dialogue box for snapshots provides users with various customization options to suit their specific needs. They can specify the timestamp format and destination folder and have complete control over how their snapshots are saved and organized.
- G-Connector seamlessly integrates with Google Drive, allowing you to effortlessly save snapshots to your specified folder. Each snapshot is saved with a timestamped filename for easy retrieval and reference.
With simple setup procedures, customizable options, collaborative features, and seamless integration with Google Drive, G-Connector makes it easier than ever to access and analyze historical data.
Conclusion
Maximize the potential of your Salesforce data with our unlimited import/export feature to Google Sheets. Easily extract data from Salesforce, collaborate on it in Google Sheets, and upload it back to Salesforce with a single click.
Manage your Salesforce data in Google Sheets with ease. You can mass insert, update, upsert, manage duplicates, and delete data manually or automatically.
With Google Sheets’ powerful tools, you can create professional and shareable dashboards.
We hope this guide has made it easy to understand how to use Salesforce Reporting Snapshots, breaking down the process into simple steps using G-connector. But there’s more to explore! Look at the different solutions offered by Xappex’s G-Connector to take your Salesforce experience to the next level.
Transform your Salesforce data management with G-Connector
Trusted by over +330K professionals worldwide, G-Connector makes reporting in Google Sheets easy with your Salesforce data, saving you time and effort.
Discover the power of G-Connector and change how you manage and analyze data. Your journey to efficiency starts now.
Get started now with G-Connector 14-day free trial
Rajeshwari Jain
Content Manager
Rajeshwari Jain is a Technical Support Specialist and Content Writer at Xappex. She applies her practical experience to assist customers and create articles on how Xappex tools work with Salesforce to improve data management and increase efficiency.
She began her IT career in 2022 as a Quality Assurance professional before transitioning into Salesforce administration and technical writing in 2023. With Salesforce Certified Administrator and Associate certifications, Rajeshwari writes blogs on Salesforce flows, admin tools, and updates to expand her skills outside of work.
In her free time, she enjoys reading tech blogs and experimenting with new tools.
Feel free to reach out to Rajeshwari for collaborations or to check out her Salesforce-focused content.