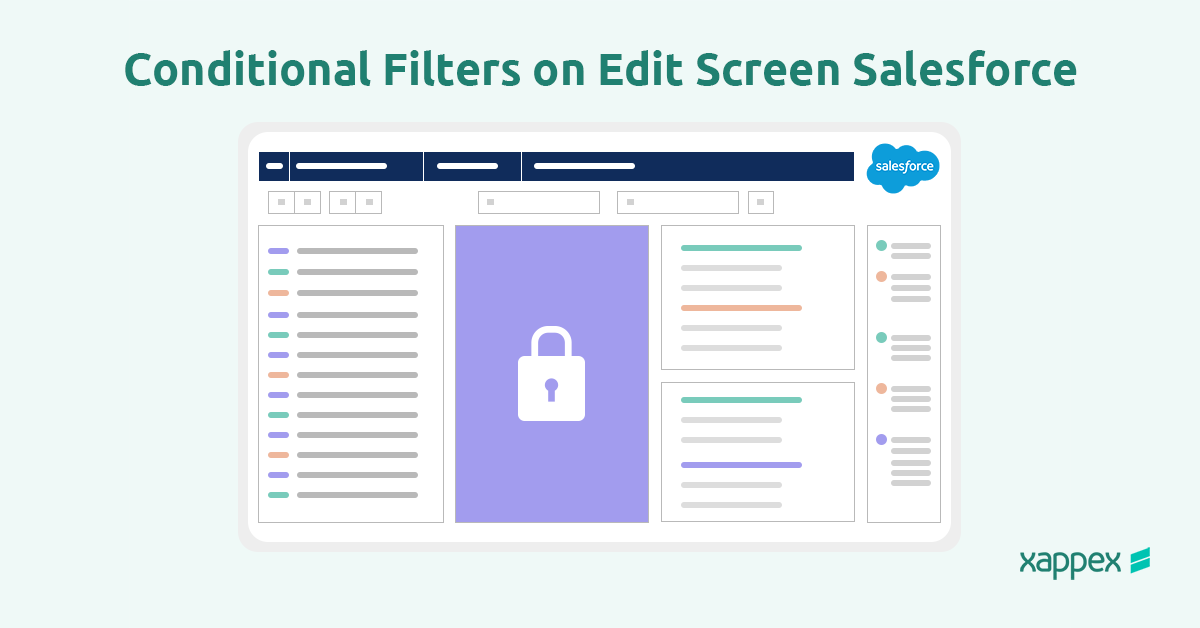
Conditional filters are a powerful feature in Salesforce customization that allow admins and developers to display or hide sections or components on an edit screen based on specified criteria. By dynamically adapting the user interface to the context of a record or user action, conditional filters help streamline workflows and improve user experiences.
Using conditional filters, organizations can:
- Enhance Productivity: By showing only relevant information, users can focus on the data they need to complete tasks efficiently.
- Improve Data Accuracy: Reduce confusion and prevent errors by limiting visible sections to those that are applicable to the current record or situation.
- Simplify User Interfaces: Provide a cleaner and less cluttered interface by hiding unnecessary or irrelevant components.
- Support Complex Business Processes: Enable workflows by conditionally displaying fields and components based on user roles, record types, or other criteria.
This guide will walk you through the key concepts, configuration steps, and best practices for implementing conditional filters on edit screens in Salesforce.
What Are Conditional Filters in Salesforce?
Conditional filters are logic-based criteria applied to Salesforce sections or components to determine their visibility or accessibility on the user interface. Unlike standard filters, which are typically used to limit records in reports or list views, conditional filters dynamically adjust the UI based on real-time data or context.
Key distinctions between conditional filters and standard filters:
- Dynamic vs. Static: Conditional filters work in real-time to adapt the UI, while standard filters are static and apply predefined rules to datasets.
- UI Customization: Conditional filters directly impact the user experience on forms and edit screens, whereas standard filters focus on data visibility in views or reports.
How to Set Up a Conditional Filter on an Edit Screen
Step 1: Define the Criteria
Determine the conditions under which a section or component should be displayed or hidden. Common criteria include user roles, profiles, record types, and field values.
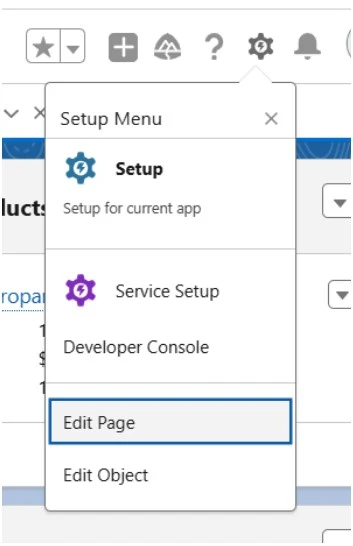
Step 2: Navigate to the Object’s Page Layout
Go to ‘Edit Page’ in one of the records for the object to open the Lightning App Builder.
Step 3: Add a Component or Section
Drag and drop the desired component onto the layout. Ensure that it aligns with the intended placement on the edit screen.
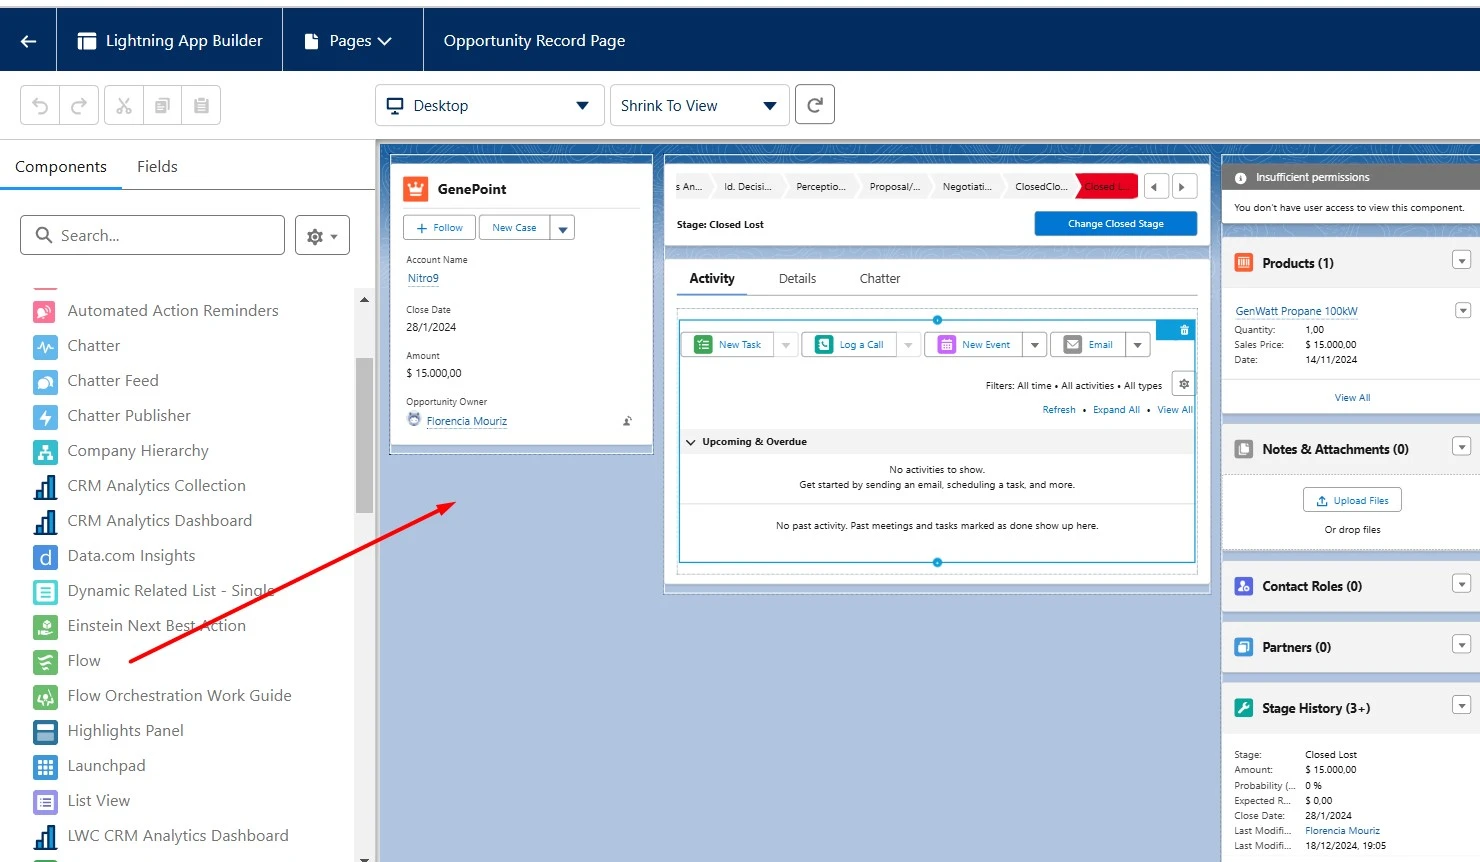
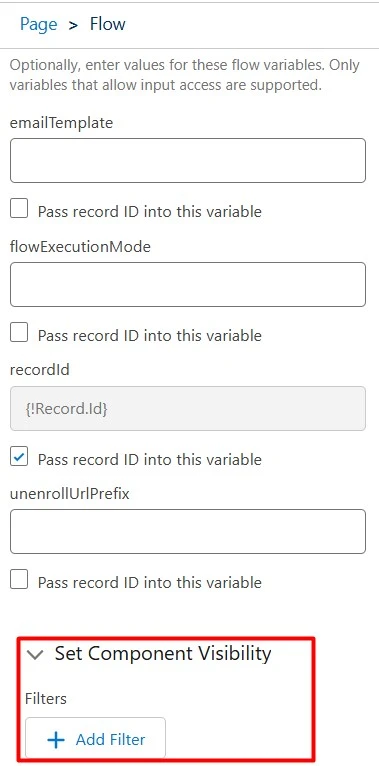
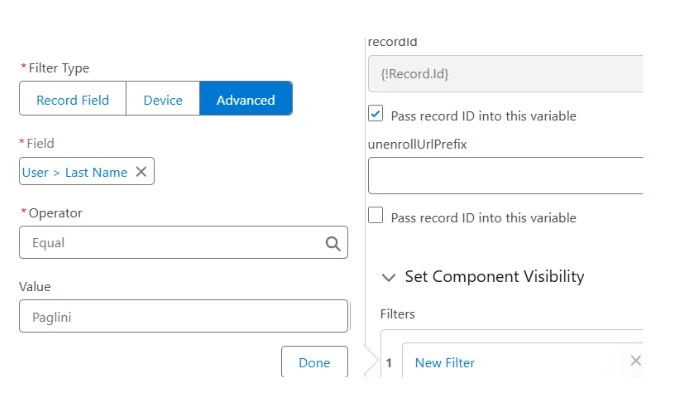
Step 4: Set the Conditional Visibility
Click on the section, and configure its visibility settings. Use the “Set Component Visibility” option to add conditional filters based on criteria such as field values, user attributes, or record types.
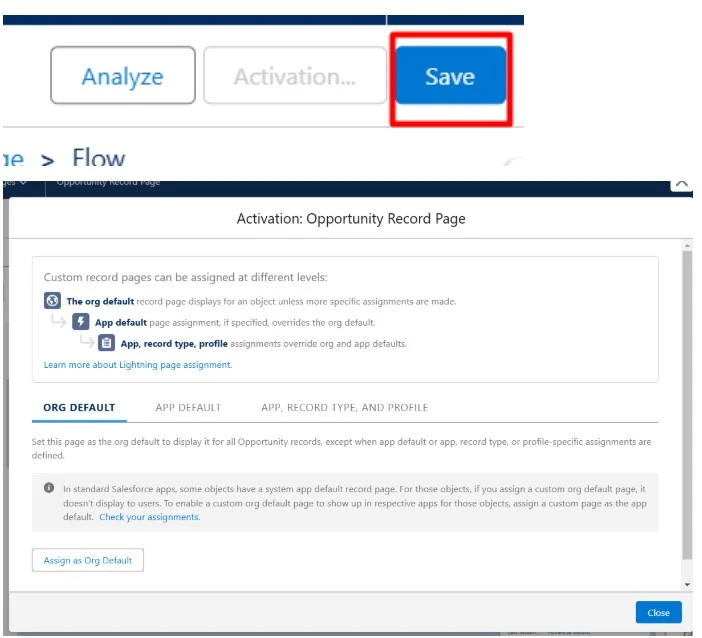
Step 5: Save, Activate and Monitor
Once satisfied with the configuration, deploy the changes by saving and activating the page. Monitor user feedback and system performance to identify any potential improvements.
Conclusion
Conditional filters are an essential tool for Salesforce customization, enabling tailored user experiences that drive productivity, accuracy, and streamlined workflows. By applying the steps outlined in this guide, administrators and developers can unlock the full potential of conditional filters and support complex business processes.
For organizations seeking advanced solutions for data management and Salesforce optimization, consider exploring Xappex’s XL-Connector. It offers powerful tools for seamless data integration and management, including metadata, which will let users customize their objects, fields and accessibility. Download XL-Connector today and start experiencing the next level of data management!
Start a 14-day free trial of XL-Connector and see an immediate boost in your data management!

Florencia Mouriz
Florencia Mouriz is a professional with over two years of experience at Xappex, where she has performed as a Technical Support Agent and Coordinator, and Technical Writer. In this role, Florencia provides support to customers while creating educational content and tutorials that guide users through the implementation of Xappex tools with Salesforce. Her contributions seek to enhance customer understanding and optimize the use of these tools.
Before joining Xappex, Florencia gained valuable experience participating in diverse projects for other companies, where she worked as a Salesforce Administrator and implemented Vlocity solutions. She has an extensive background in Salesforce ecosystems and is determined to deliver impactful results for our company.
Based in Tandil, Bs As, Argentina
To learn more about Florencia’s experience and connect with her, visit her LinkedIn profile