Being able to insert data into Salesforce directly from Google sheets is a great solution for Salesforce admins to save time and effort. Xappex G-Connector provides an easy way to mass insert new records in Salesforce directly from Google Sheets.
To create new records in Salesforce you will only need a spreadsheet with your data.
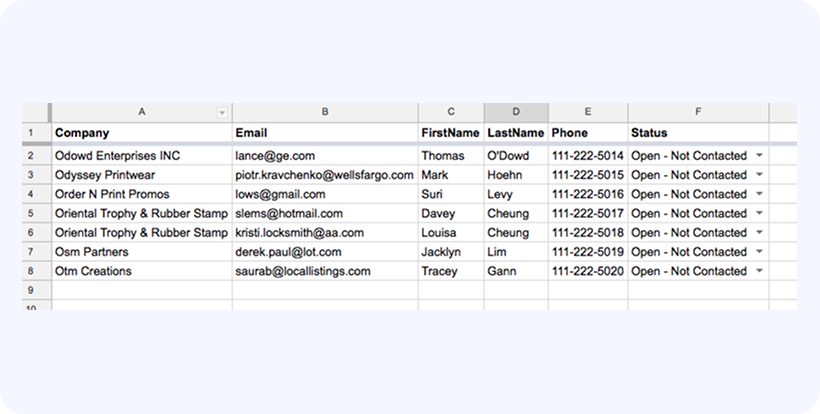
Let’s say we want to insert a list of Leads to our Salesforce org.
We already have the data that we need to upload on our spreadsheet.
Mass Insert Leads in Salesforce from a Google Sheets
Let’s say we want to insert a list of Leads to our Salesforce org., as this is probably the most common scenario in any CRM. Follow these easy steps to seamlessly mass insert leads in Salesforce with G-Connector:
To create new records in Salesforce you will only need a spreadsheet with your data.
To load the above Leads you’ll need to do the following:
-
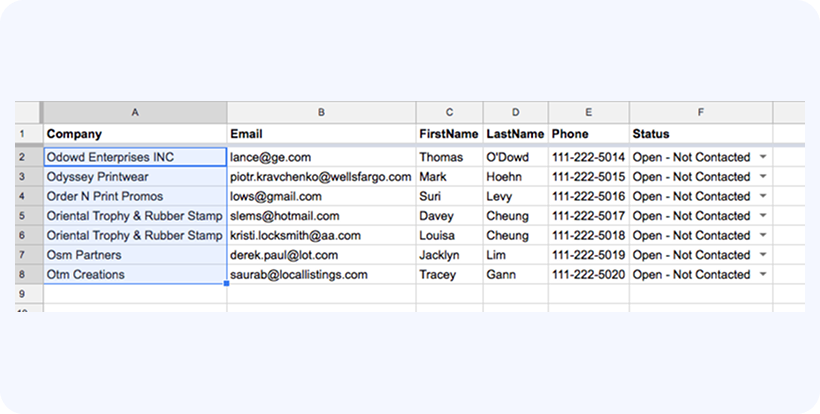
Log in to Salesforce. Select cells in your sheet so that your selection spans across all rows that you want to insert (it doesn’t matter if the selection spans across one or multiple columns), e.g.:

-
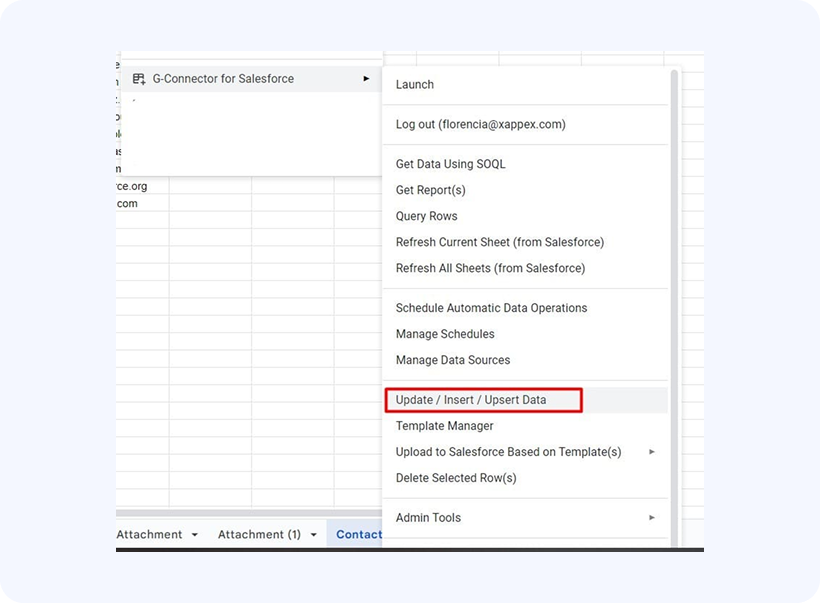
On the Extensions menu, click G-Connector for Salesforce -> Update/Insert/Upsert Data
-
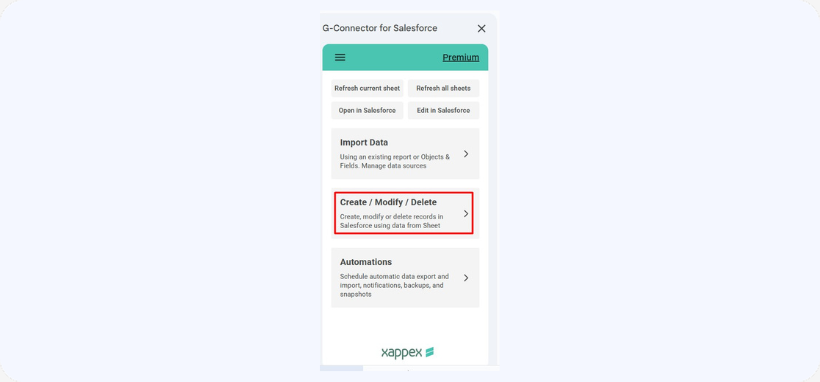
OR Click G-Connector for Salesforce -> Launch to display G-Connector’s side panel and then click Create/Modify/Delete
-
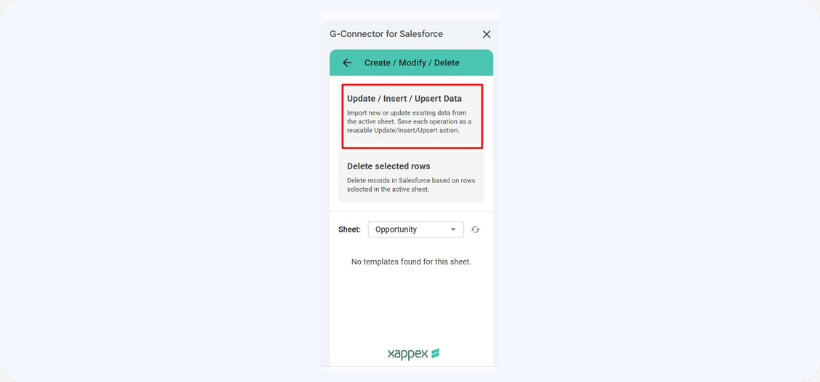
Click Update/Inert/Upsert
-
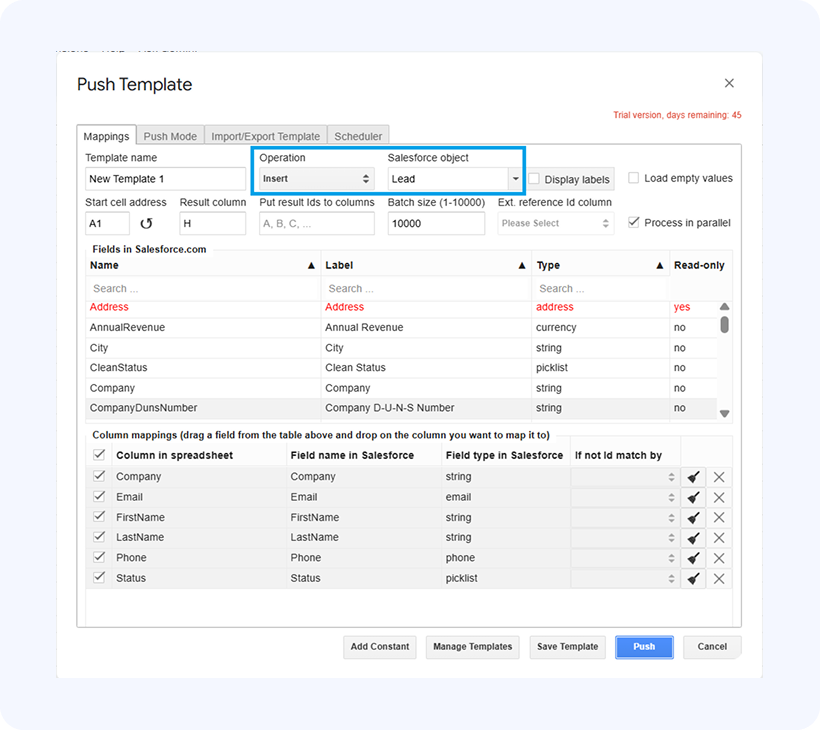
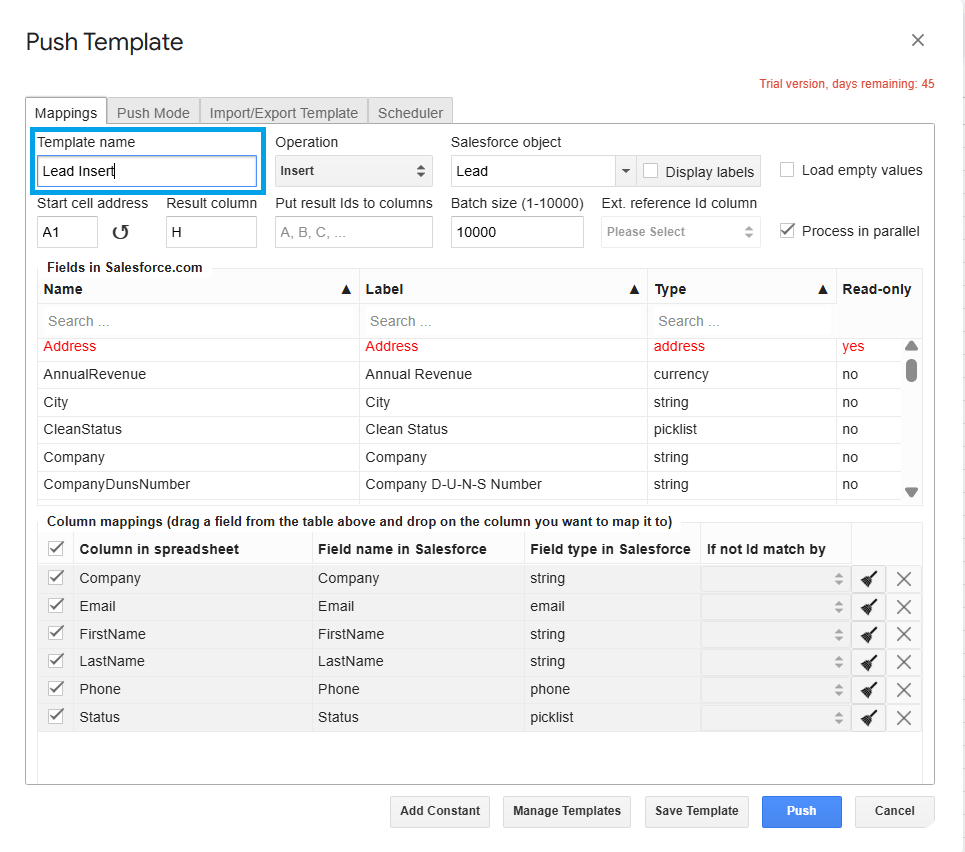
The following dialog box will appear. From the top drop-downs, select Insert as the operation and Lead as the Salesforce object, since you’ll be creating records in the Lead object.
-
5. G-Connector will try to map your columns for you, but you need to verify if the mappings are correct before proceeding.
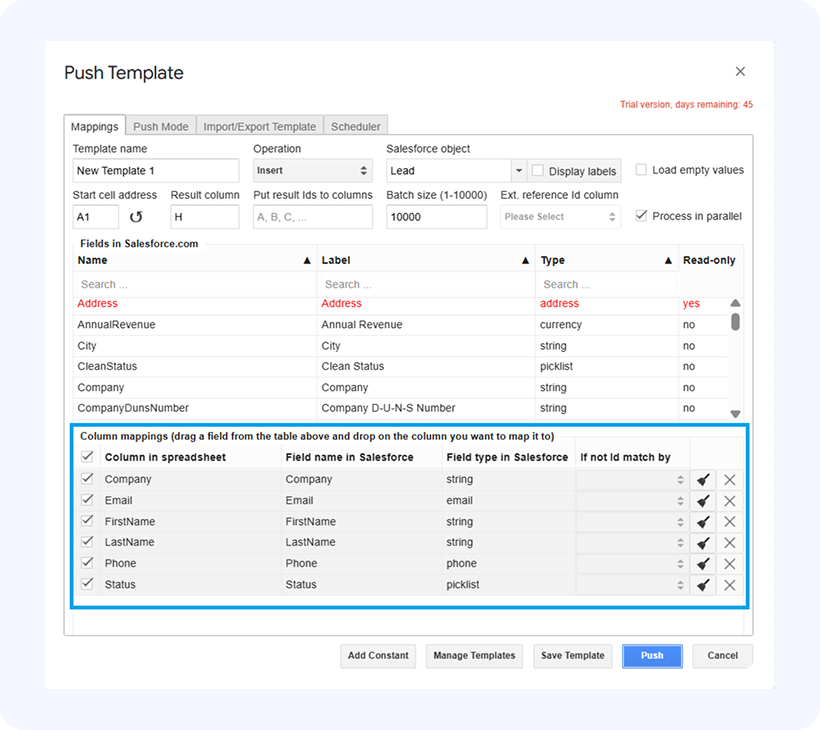
Mappings are shown in the bottom table where spreadsheet column names show up in the Column in Spreadsheet column, and fields these spreadsheet columns are mapped to – in the Field Name in Salesforce column.
The top table will list all available fields from the selected object. You can map your spreadsheet columns to fields in Salesforce by dragging fields from the top table and dropping them on the column names in the bottom table.
-
6. Give your template a name and click on Save Template to store your settings as a template for future use (optional)
-
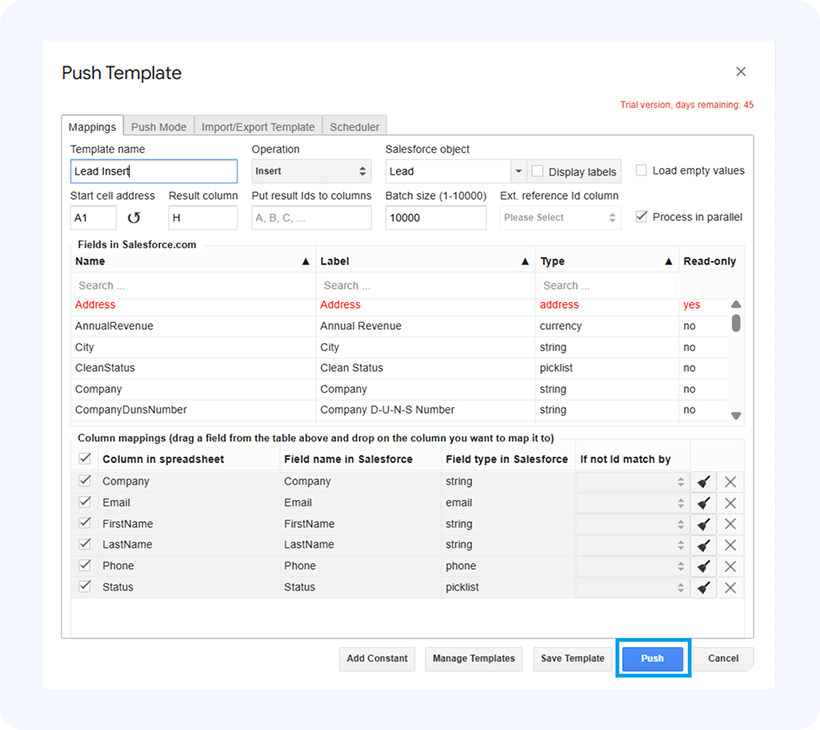
Now click Push and your Leads will be loaded into Salesforce.
-
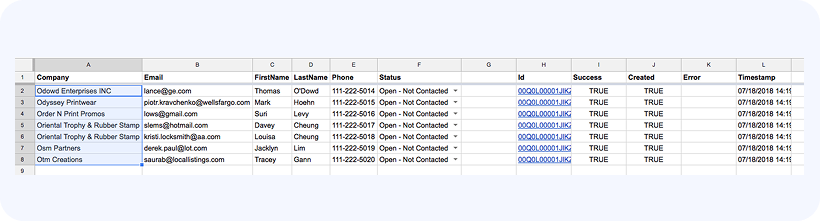
After the Insert operation has been completed, you’ll see the operation results on the very right from your data, one column over after the last data column:
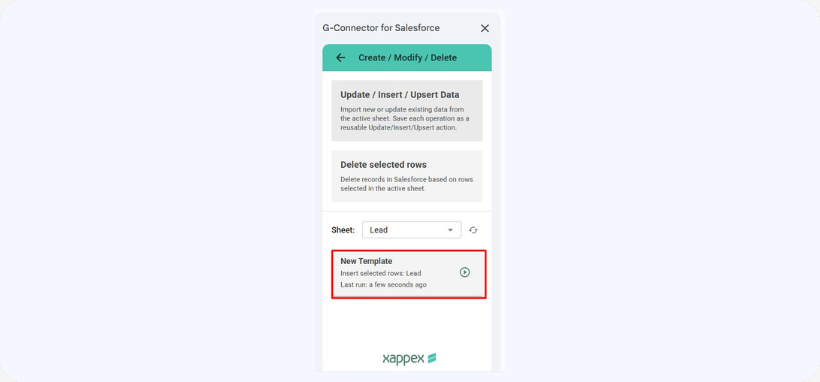
After running the operation, the template will be saved as a card under the Create/Modify/Delete section and it will be possible to run it again from there.