Mass updating Salesforce records is a task that Salesforce users regularly need to perform in order to keep the quality of their data. The best way to mass update records in Salesforce is directly from a spreadsheet such as Google Sheets. G-Connector provides an easy way to perform this: no csv hassle and no manual labor required. You can also automate and shedule your updates at your desired cadence. Set up once and forget!
How to mass update records in Salesforce from a Google Sheets
To update records in Salesforce in bulk, you will first need to pull them to your Google spreadsheet. You can do it via either SOQL or Reports.
In our example here we’ll use G-Connector to update the stage of all opportunities under one specific account. We’ll use the following query to pull the data:
SELECT Id, Name, StageName FROM Opportunity
Please note that we’re pulling record IDs. Even though a column of record IDs is required to be able to update records via Salesforce.com API, G-Connector has a built in feature to convert unique record names into Ids. Please see the following article on details about that: Using Record Names Instead of Ids in ID and Lookup Fields
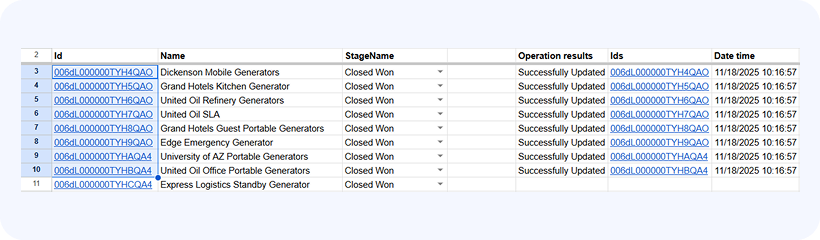
We got the following results back from our sample database:
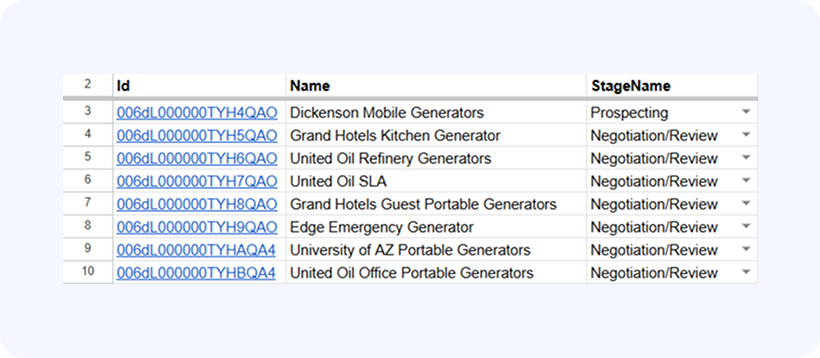
Now we want to change the stage of all four Opportunities to Closed Won. After the stage has been changed we’ll select the rows of data so that the selection spans across all the records that we want to update (it doesn’t matter if the selection spans across one or multiple columns.

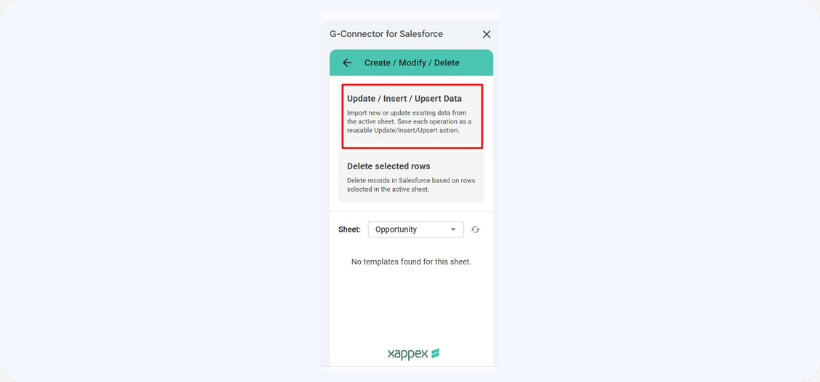
Then we’ll click Extensions -> G-Connector for Salesforce-> Update/Insert/Upsert
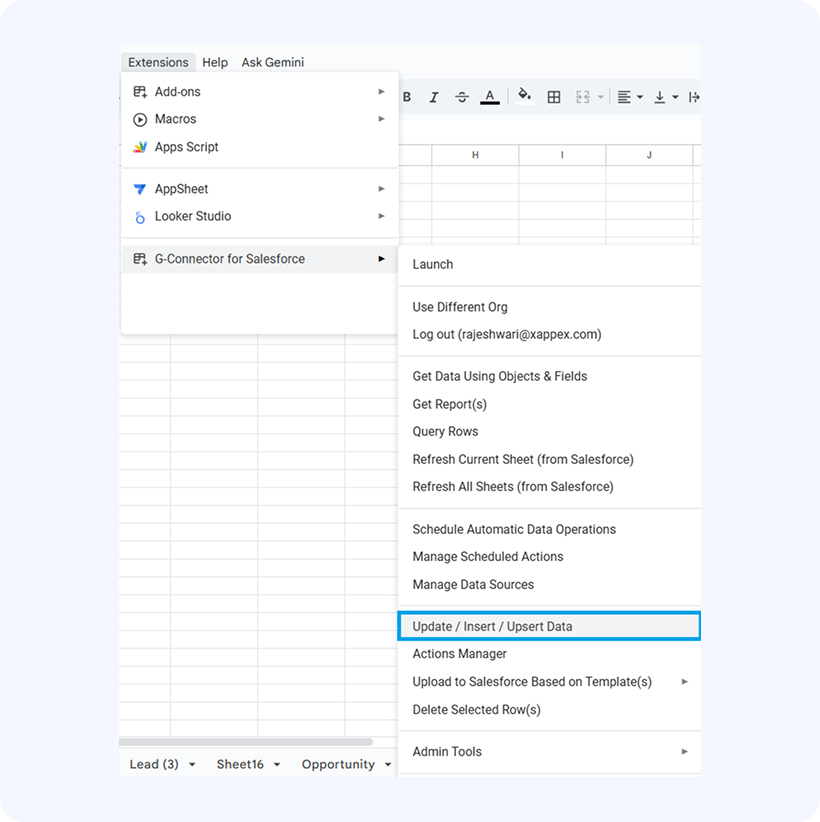
OR Create/Modify/Delete->Update/Insert/Upsert from G-Connector’s side panel.
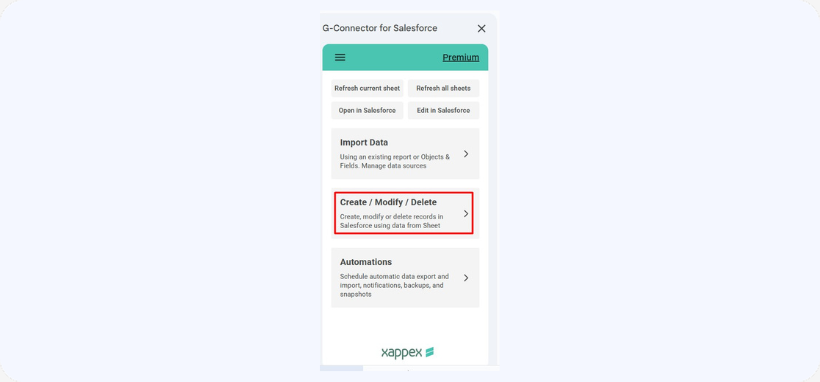
The system already knows what object the data was pulled from, that is why the Opportunity object will be already selected. The Update operation is the default one, so you won’t need to change that too:
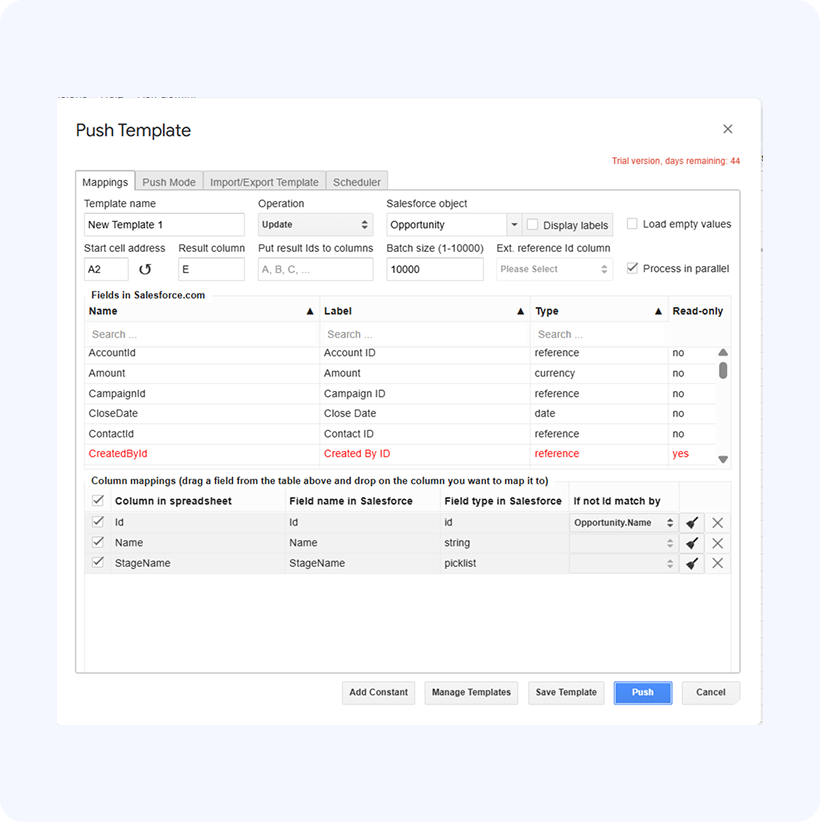
G-Connector will try to automatically map your spreadsheet columns to the corresponding fields in Salesforce, and because we pulled data using SOQL – in this case it will map all columns correctly. However, please verify the mappings each time before proceeding with an update and re-map if necessary. Incorrect mappings may lead to unrecoverable data loss!
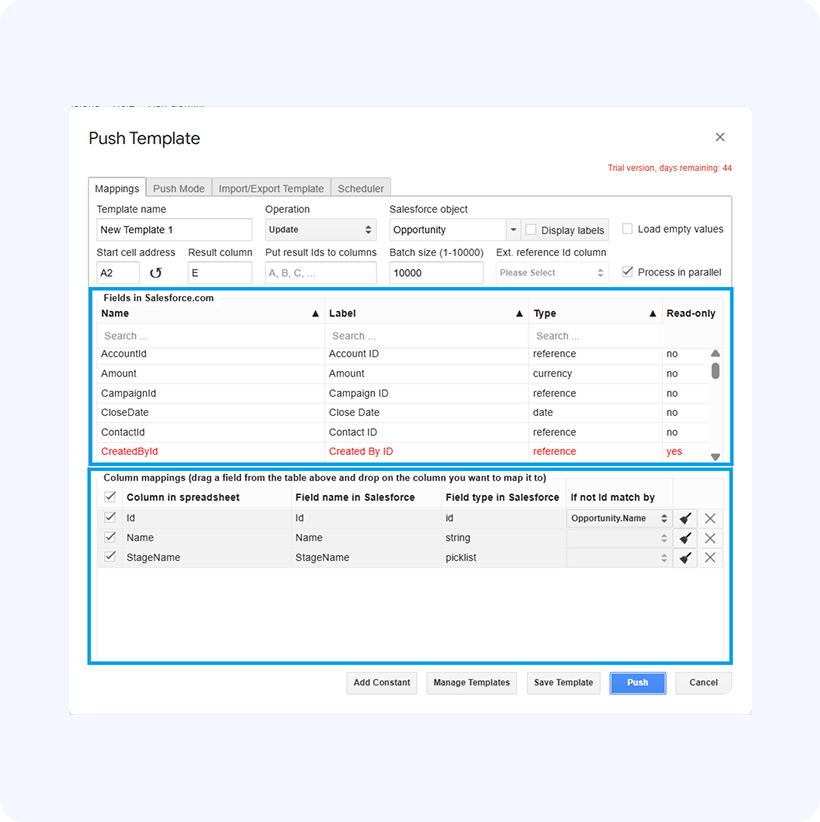
The top table in the mapping dialog lists all available fields from the selected object. You can map your spreadsheet columns to fields in Salesforce by dragging fields from the top table and dropping them on the column names in the bottom table.
Click on Save Template to save the current mappings and other settings in this dialog box as a template for future re-use.
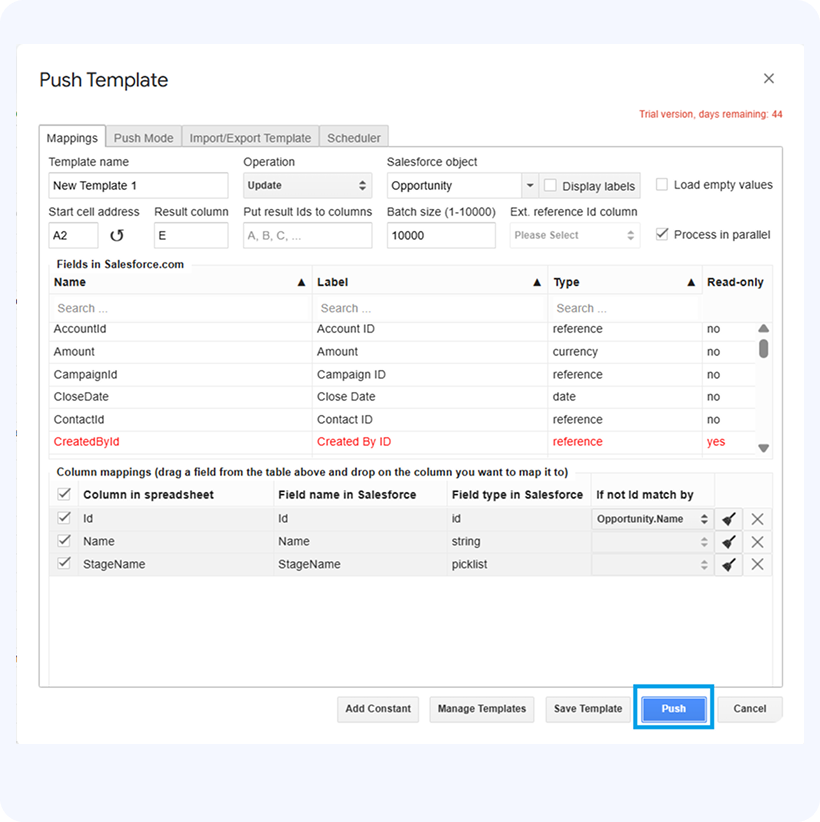
After you’ve verified your mappings and re-mapped if necessary, you need to do is click Push, and all the Opportunity records will get updated.
After the Update operation has been completed, you’ll see the operation results on the very right from your data, one column over after the last data column:
Learn more about Mass updating records in our complete guide.
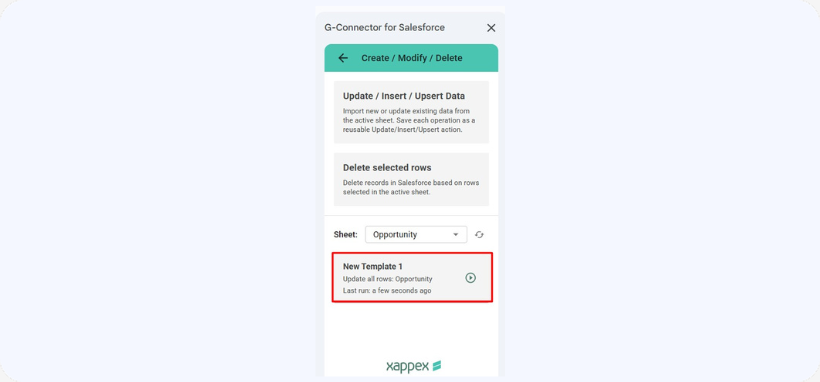
After running the operation, the template will be saved as a card under the Create/Modify/Delete section and it will be possible to run it again from there.