G-Connector’s dynamic SOQL query builder is a powerful tool that can assist you in building your query. It offers a variety of features suitable for all skill levels that make retrieving data from Salesforce into your spreadsheet quickly and easily.
How to retrieve data with Salesforce SOQL into Google Sheets
To get any data from Salesforce.com into your Google Spreadsheet using SOQL (Salesforce Object Query Language). Follow these easy steps:
-
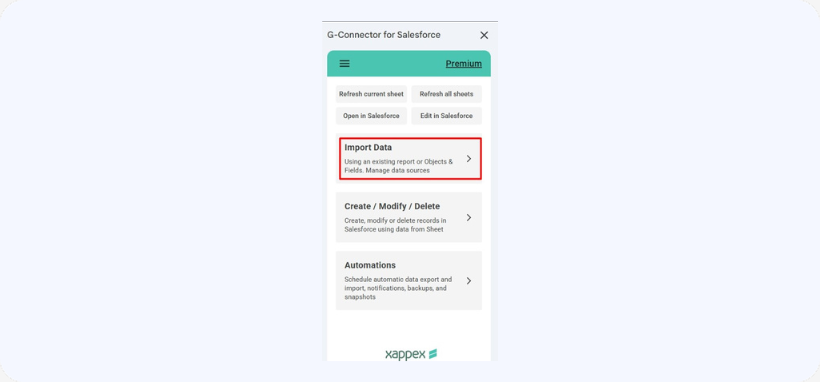
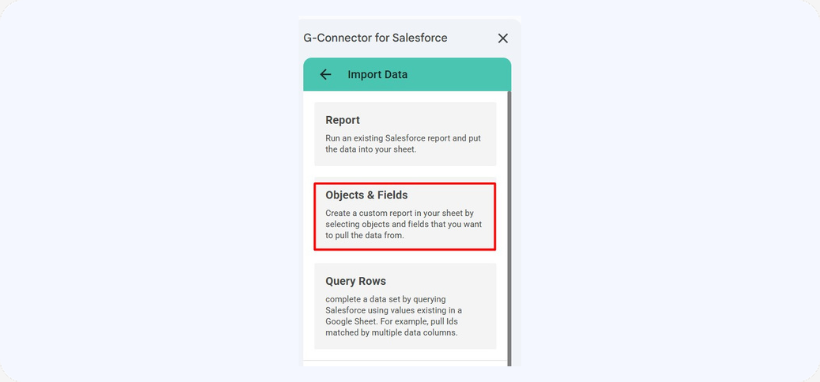
Click Get Data Using Objects & Fields on the G-Connector for Salesforce add-on menu or Launch on the G-Connector for Salesforce add-on menu to display the side panel and then click Import Data -> Objects & Fields:


-
The following dialog box will be displayed:
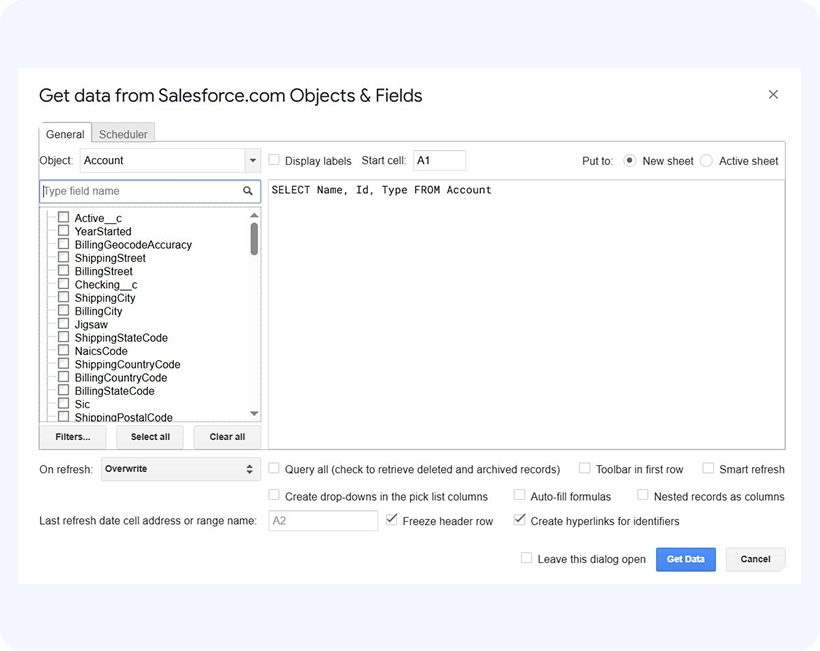
One important thing to remember when using the Get Data dialog is that it will run any text entered in the big text box as a SOQL query against the Salesforce database you’re currently logged in to. Essentially, you don’t need to use the rest of the controls in this dialog box at all, as long as you can craft a syntactically correct SOQL query. If you’re experiencing any troubles with SOQL, please refer to Salesforce’s documentation.
All other controls in the Get Data dialog are there to help you build a correct query providing you a view into your Force.com schema and making sure you’re using the correct object names, field names, and pick list values. These controls are called ‘query builder controls’.
-
Configure your Salesforce SOQL query:
You can use the query builder controls to put together a simple query with one filter.
However, if you need to have more filters or want to use subqueries – you’ll need to type them in. Here are just a couple of query examples that you won’t be able to build using query builder controls, but can still use in the query box to retrieve data into your spreadsheet:
- Select Id, Name, (Select Id, Name From Opportunities) From Account
- Select Id, Name, Account.Id, Account.Name, Account.Owner.Name From Opportunity
- Select Id, Name From Account Where Id IN (Select AccountId From Opportunity Where Owner.Name = ‘John Snow’)
You can also reference existing values in your spreadsheet by specifying the cell address in square brackets, for example:
SELECT Id, Name FROM Opportunity WHERE Owner.Name = [Sheet1!C15]
or
SELECT Id, Name, StageName FROM Opportunity WHERE Id IN [Sheet1!A2:A20]
Explaining the dialog box's user interface for SOQl query building
- Display labels
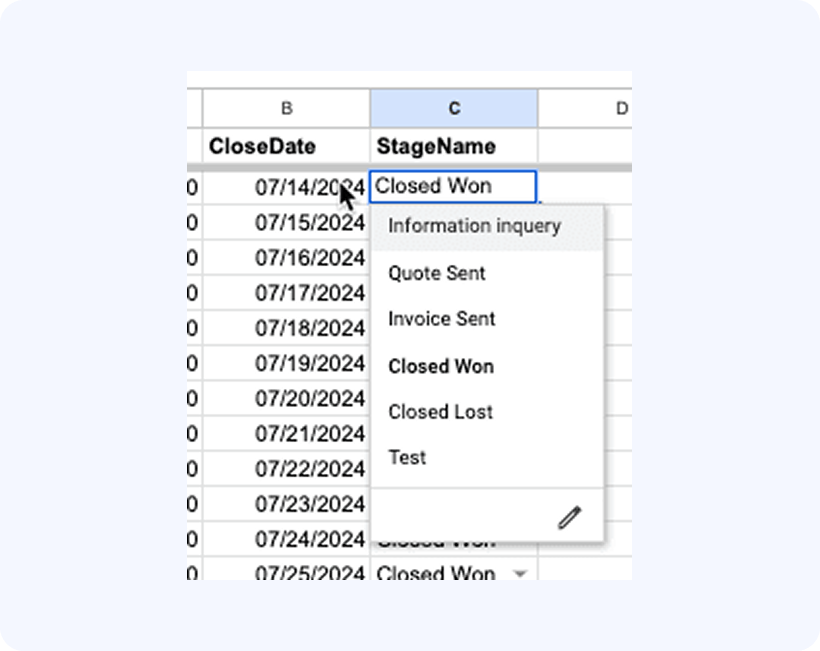
This box determines if object and field API names or labels will be displayed in the dialog box. - Create drop-downs in picklist columns
If checked, we’ll add a drop-down into each cell of a column coming from a ‘picklist’ field in Salesforce as follows:
- Put to: New sheet(s) or Active Sheet
This option indicates whether the exported data will be placed into the currently active sheet or a new sheet will be created for it. By default this option is New sheet(s) when running an SOQL query for the first time, and Active sheet if running a query from a sheet where data has been previously downloaded. - Query all
If this box is checked, the query will retrieve deleted and archived records, similarly to specifying the ALL ROWS keyword in the query text. - Start cell
This option will let you determine the starting point for the exported data. It indicates the top leftmost corner of the data when exported to a Google sheet. There can be only one SOQL run into one given tab. - Freeze header row
If on, the header row will be frozen after the pull to allow for data scrolling while keeping the headers visible. - Auto-fill formulas
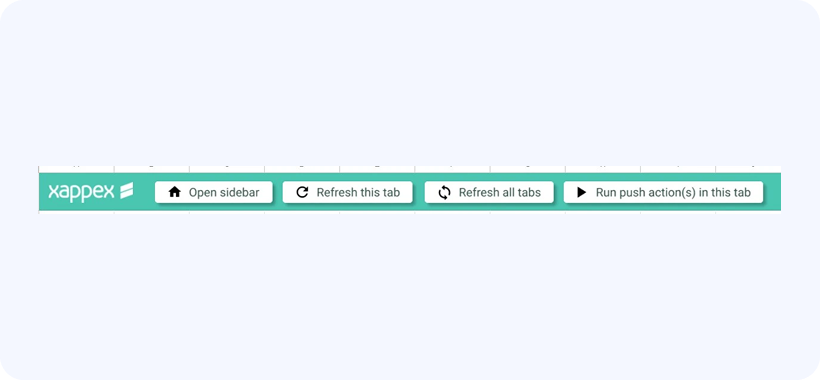
Set this option if you have additional formula columns to the right of your data and would like them to expand/contract as the number of rows in the exported data changes on each refresh. - Toolbar in first row (this option is selected by default. Unselect it and change start cell to disable it.)
Having this checkbox selected will create a toolbar in the first row with buttons to open sidebar menu, refresh sheets and run push
templates in the sheet. The start cell of your data will be defined as A2 for this to work.
- Conditions
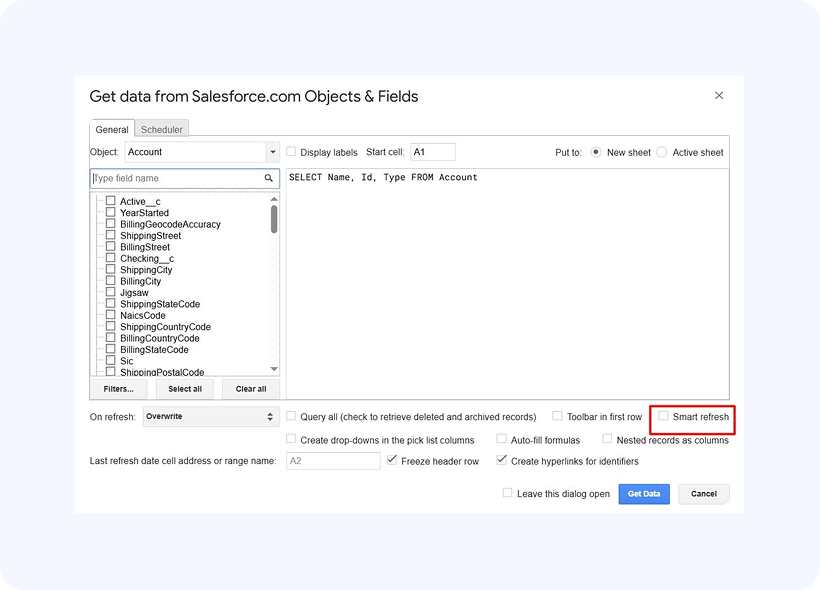
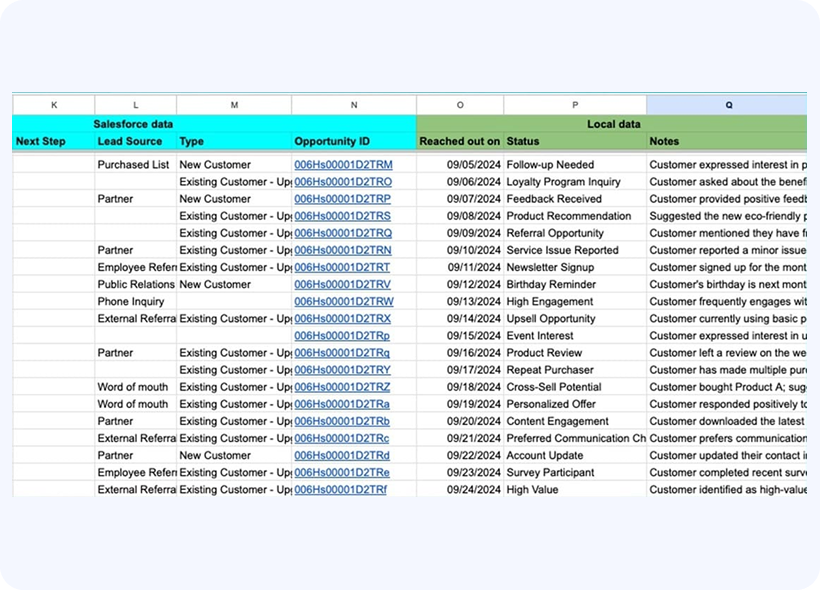
Provides point-and-click interface to define one or more filters for the query. - Smart refresh: when this box is checked, the query refresh will update existing sheet rows at their positions using record ID. New rows will be added at the end, and missing sheet rows will be removed. Salesforce record ID must be present in the data source to identify the rows and use this feature.This will let you have custom data columns that are not present in Salesforce next to your Salesforce data rows and they will always remain aligned! Also any sorting applied to the data in the spreadsheet will remain unaffected on refresh, even if the source data is sorted differently.
- On refresh: Overwrite, Append, Create new sheet
This drop-down determines the behavior of the exported report when it is refreshed using the Refresh current sheet (all sheets) G-Connector command or the refresh performed by the automatic scheduler. The following options are available:
– Overwrite: the default mode. Will overwrite the data in the sheet with newly exported data. This operation will clean up any remaining data (if the exported data is smaller than the one already in the sheet).
– Append: in this mode, each refresh will append all export data at the end of the previously exported data. Having duplicates after the repeated refreshes is highly likely in this mode. Therefore, it’s up to you to make sure the report returns new data or has a DateTime column that is different in all rows to be able to analyze the data by.
– Create new sheet: in this mode, a new timestamped tab will be created for each report refresh. This mode is good if you want to keep snapshots of your data in the same Google sheet. Keeping snapshots of your data in different Google Sheets is achieved using G-Connector’s snapshotting functionality.
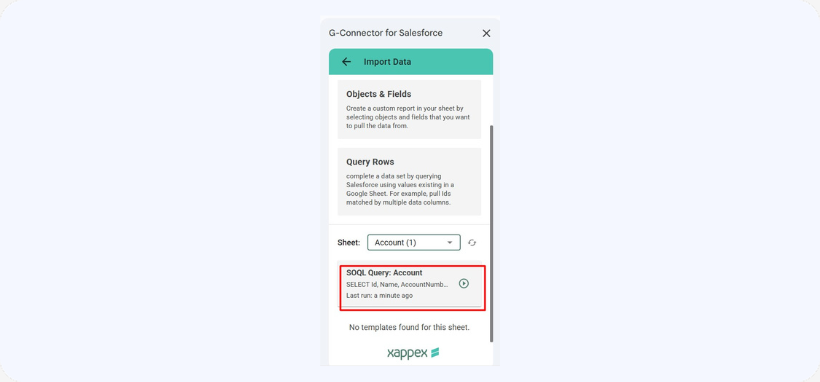
Once a query is executed, it will show up as a card under the Import Data button and it will be possible to run and delete it from there.