Learn how you can easily update records in Salesforce directly from an Excel sheet with the help of XL-Connector in a few easy steps. No csv. files and manual hassle!
Bulk update Salesforce records with XL-Connector by following these simple steps:
-
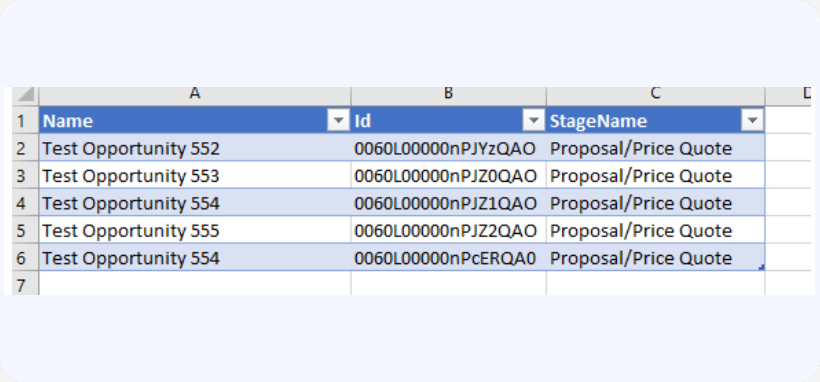
To Bulk update records in Salesforce, you will first need to pull them to your Excel spreadsheet. You can do it using either SOQL or Reports. In our example here we’ll use XL-Connector to update the stage of all opportunities under one specific account. We’ll use the following query to pull the data:
SELECT Name,Id, StageName FROM Opportunity WHERE Account.Name = ‘AVL GmbH’
Please note that we’re pulling record IDs. Even though a column of record IDs is required to be able to update records via Salesforce.com API, XL-Connector has a built in feature to use unique record text fields instead Ids. Please see the following article on details about that: Using Record Names Instead of Ids in ID and Lookup Fields.
We got the following results back from our sample database:
-
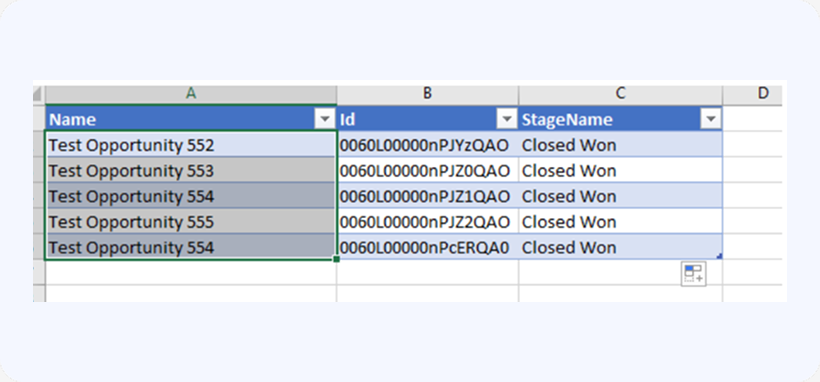
Now we want to change the stage of all four Opportunities to Closed Won. After the stage has been changed we’ll select the rows of data so that the selection spans across all the records that we want to update:

-
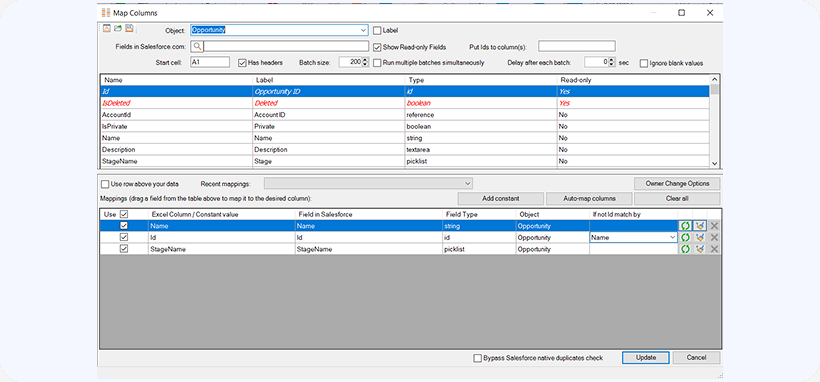
Then we’ll click Update up in the XL-Connector ribbon.
Because we pulled our data using XL-Connector’s Get Data tool, the system will automatically map the columns so that we don’t have to worry about it. If you used Reports to pull your data, you might need to map your Excel columns to fields in Salesforce.com manually by dragging fields from the top table and dropping them on the corresponding Excel columns in the bottom table.
-
Now all we need to do is click Update in the Mapping dialog and all our Opportunity records will get updated almost instantly. Note that if you have a ton of records to update, errors slow the process down. There is a tradeoff between speed and error-handling, though: the larger the batch size you select in XL-Connector, the more records will be marked as failing for each error encountered.
Watch our tutorial video:
If you want more information about Mass updating Salesforce records, you can visit our blog post about this subject.