Upload Multiple Related Records in Salesforce at once
Easily upload related records in Salesforce with XL-Connector flows
Starting with XL-Connector version 3.0, you can chain-load multiple related records in one shot and make all the Master-detail or Lookup relationships work. In this article we’ll show you a simple scenario of creating two Accounts with five Opportunities under each of them.
To make this operation possible, we’ll use the new ability of XL-Connector to have multiple flow steps in the same worksheet, which allows to perform multiple DML operations on different SFDC objects sequentially.
To be able to create this template, you must be running XL-Connector Enterprise Admin. Once created, the template can also be used in XL-Connector Team Player.
- Let’s start with an empty Excel spreadsheet and populate some dummy data for 7 columns we’ll use to load our Accounts and Opportunities. We wanted to keep this tutorial simple, so we only used Name and Website columns on for Account object, and Name, StageName, Amount, and CloseDate columns for the Opportunity object:

- Now click Edit Flow button up in the XL-Connector ribbon. Click on the Steps tab and then click the ‘Plus’ button to create a new flow step. Name it ‘Create Accounts’, make sure it starts at A1:

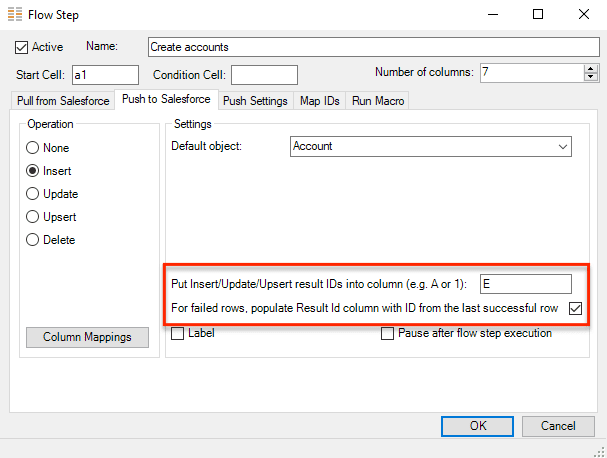
- Then click on the ‘Push to Salesforce’ tab, specify the DML operation as ‘Insert’, and select the Account object from the list of available objects. Now the following is essential for what we are trying to do:
Specify column E as the column to put created IDs into, and check the box to populate this column with the last successful ID (this is required to populate the Account Ids for all opportunities, not just for the row where account is created):
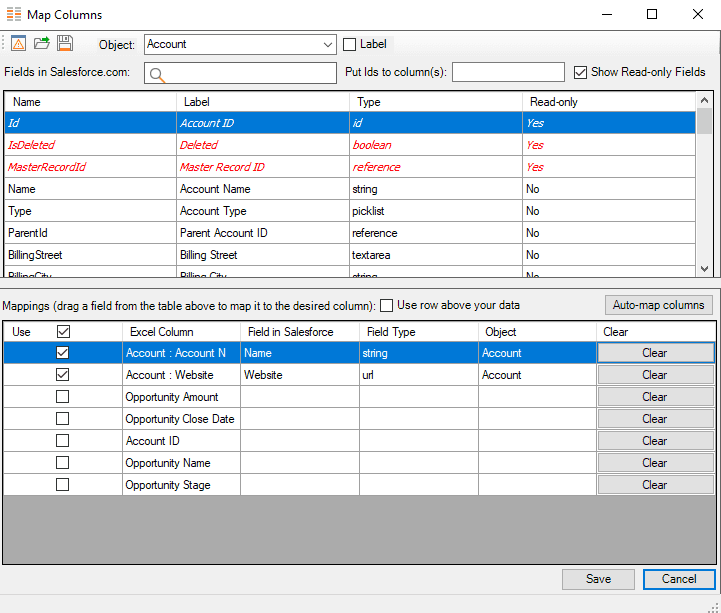
- Click on the Column Mappings button, and map the two columns we will be loading to our Account table in Salesforce to the corresponding fields. Uncheck the ‘Use’ box for the rest of the columns:
- Click OK to close the Column Mappings dialog box, then make sure All Rows is specified under the Push Settings tab.
- Click OK to save the Create Account mapping. At this point the part of the template responsible for the creation of Accounts is completed.
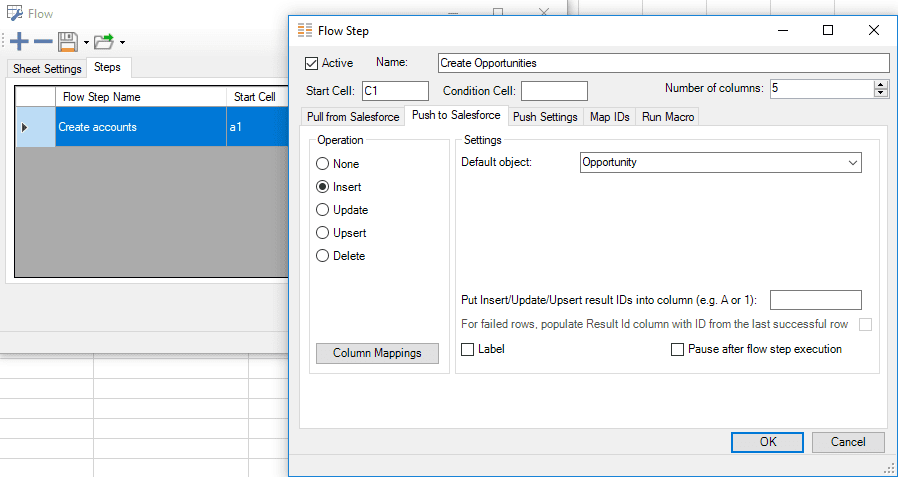
- Click on the ‘Plus’ button in the Edit Flow dialog box again to create another flow step, this time indicate that the data will start at C1.
This flow step will be used to load Opportunities under the Account created in the first step. - Click on the Push to Salesforce tab and adjust the settings there as follows:
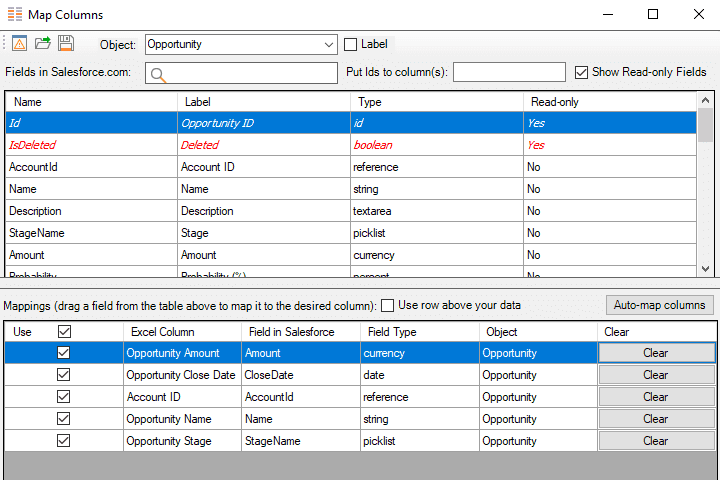
- Click Column Mappings and this time map your Opportunity columns :
- Click OK to close the Column Mappings dialog box, then make sure All Rows is specified under the Push Settings tab.
- Click OK again to save your mapping. Mappings are executed in the order they appear on the screen, so make sure your Accounts are created first, and then – Opportunities:
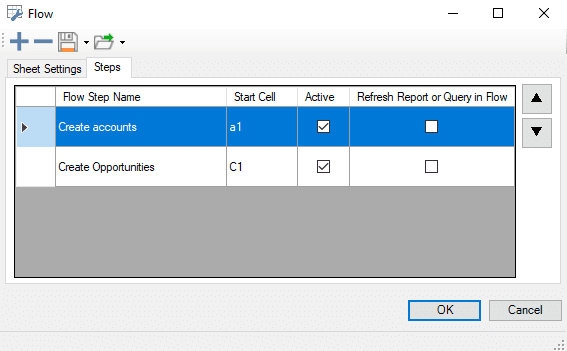
You can rearrange the mappings and thus their order of execution by clicking the Up and Down arrows on the right. - Now any user running XL-Connector Enterprise Admin or Team Player can execute this template thus creating multiple accounts with multiple Opportunities underneath each of them in a single click on the Run Flow button:
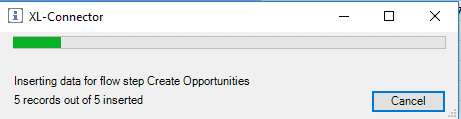
As a result of this operation, there will be 1 new Account in your sandbox, and 5 related Opportunities. You can quickly verify it by selecting one of the Account Id and clicking Open in Salesforce button up in the ribbon.
As you’ve probably already realized, we used a trick where Accounts in rows 3-6 were not loaded due to an error (we didn’t specify the Account name on purpose) and setting in the Create Accounts mapping allowed us to put the Created Id to the C column not only for successfully created accounts, but also for the failed ones, thus allowing us to create multiple Opportunities under the same Account.
This trick can be used to upload much more complex scenarios involving multiple layers of related objects. You just need to keep in mind the following several things when creating such complex mappings:
- The order of execution is defined by the order of appearance of mappings in the Flow Steps dialog box.
- Purposefully make parent records fail by not providing a mandatory column to have only child records load for that row. Make sure that For failed rows, populate Id column with with result Id from the last successful row box is checked.